Difference between revisions of "Lead"
(→Leads) |
|||
| Line 252: | Line 252: | ||
This module has an address validation through Google Maps. The address information section has a “Validate Address” button to get the correct street and map coordinates (latitude and longitude values). States and Cities brackets are connected, and each one has a search field to easily identify values of states or cities. | This module has an address validation through Google Maps. The address information section has a “Validate Address” button to get the correct street and map coordinates (latitude and longitude values). States and Cities brackets are connected, and each one has a search field to easily identify values of states or cities. | ||
| − | + | [[File:213.jpg|700px|frameless|right]] | |
| − | |||
| − | |||
| − | |||
| − | |||
| − | |||
| − | |||
| − | |||
| − | If a Management Company was selected for the Lead under work, and the information exists on the database, the fields are automatically populated. | + | Field of information on this section are: |
| + | *'''State''' ''Mandatory'' | ||
| + | *'''City''' ''Mandatory'' | ||
| + | *'''Street''' ''Mandatory'' | ||
| + | *'''Suite''' | ||
| + | *'''Apartment''' | ||
| + | *'''Bill Box Number or PO:''' defines the PO number in case an invoice or something else needs to be sent by mail. | ||
| + | *'''Electronic Email Bill:''' defines an email address to where the invoice should be sent. | ||
| + | *'''Special Billing Instructions:''' in case the job is completed, notes regarding special billing instructions can be added. | ||
| + | |||
| + | |||
| + | |||
| + | If a Management Company was selected for the Lead under work, and the address information exists on the database, the fields are automatically populated. | ||
===Pothole Damage Info=== | ===Pothole Damage Info=== | ||
Revision as of 18:44, 3 September 2020
From a marketing standpoint a Lead is a prospect, which means it is a potential customer. It is usually the next step to the RPH when a pothole is detected and there is no site existent in the system to link it with.
Nevertheless, for administration purposes, a Lead is known as a “site”; and the same happens for an Account.
Leads Structure
The structure for a site, no matter if it is a Lead or an Account, is a parent-children relationship. The Parent account can be found as “Management Company” or “Management Account” in the system; a Lead can be or not linked to a Parent account.
For example, a company may have headquarters (parent account) and 3 subsidiaries (children). Each one of those subsidiaries are the children of the headquarter, and each child is considered a Site in the system, since the geographical address for each one is different. If a new Lead is added and the user indicates that the headquarter is the parent account, then the new Lead will become a child of that account.
This is an important aspect that needs to be considered when creating a new Lead. According to this, there are 3 different situations under which a lead can be created:
- The Lead doesn’t have a major account related to it, therefore it is self managed.
- The Lead does have a major (parent) account related and the same is already registered in the system.
- The Lead does or could have a major (parent) account, but this isn’t registered in the system.
The structure is important for the business since many process (eg the invoices that are sent for the services provided) are defined depending on that.
PENDING TO ADD A STRUCTURE GRAPHIC

From the menu panel it is possible to access to the following functionalities:
- Create a Lead: this is the form to create a lead manually.
- View All Leads: list all the existing leads and allow the user to filter and search by different parameters.
- Merge Leads: allows the user to merge 2 or more different leads into 1 in order to avoid duplications and have repeated information.
- Lead to Account Conversion: allows to convert a Lead into an account.
New Leads
This option takes the user to the “Create a New Lead” form. For more details on how to create a Lead and this form, please redirect to the section in this document "How to create a Lead"
View All leads
The system allows to list all the existing leads on the platform and quickly review if the user has activities or reminders related to any of them. There are three tabs, each one with different features:
Lead List
On this tab is possible to see the list of the existing Leads in the database, filtered by specific parameters. There is also a search bar that can be used to refine the search by looking among the shown results.

Filters available are:
- Owner: filter by the owner of the Lead
- Quick Search: filter by predefined range of time
- Property type: Specifies if a particular Property type needs to be filtered.
It is also possible to activate the “Custom Search” that will enable more filtering, such as:
- Status
- From date (creation)
- To date (creation)

Once the filtering is done, the system will show the results in a list. The user can search among the results by writing on the “Search” field (magnifying glass); it will refine the results if there are matches with any field of the shown results.
The results can be extracted and downloaded to the local disk in different formats such as CSV, Excel, PDF or can be directly printed or copied to the clipboard.
The information of the Leads shown in this columns is:
- Management Company: parent account
- Company: company related to the Lead
- Contact: contact of the lead. May be an existent contact or a new one.
- Main Phone: contac's main phone number.
- Mobile: contact's mobile phone number
- Street: street declared for the lead
- City: city of location for the lead
- State: state (province), location of the lead
- Protected: informs whether the Lead is protected by another user or not.
- Status: current status of the Lead.
- Last Activity: date of last edition
- Date of creation: Lead creation date
- Owner: owner of the Lead.

From this list there is also access to the column “Options”, with more buttons that work as shortcuts to:
My activities
Enlists all the tasks, open or closed, assigned to the user that are related to any Lead.

My reminders
Enlists all the Events or Tasks assigned to the user that are related to any Lead.

Merge Leads
This module allows the user to merge and/or delete contacts.
When merging a Lead, all the related info will be moved to the selected destiny Lead and the merged one will be deleted. To delete a Lead the same process needs to be followed, but in this case there is no need of selecting a destiny.

Steps to merge a Lead:
- Select Lead
- Select the values wishing to keep
- Select the Related info to keep in the selected Master Lead
- After this, press “Merge” button to start the process
- Users can use the option Delete After Merge to remove the contact with the remaining related data
A special permission is needed in the system to execute this tasks, no matter the role of the user doing it.
Lead to account Conversion

A lead is automatically converted into an Account when the opportunity related is closed as won, but in case a user wants to convert the Lead manually is possible through this section.
- The user should search for the Lead to be converted, and select “Convert”
- The system will save the record in the Account module and the Lead will disappear.
As for the “Merge Lead” functionalities, a special permission is required.
How to create a Lead?
Just like in the case of the RPH creation, there are two ways in which a Lead can be created. One is the manual creation by the users on the CRM and the other one is automatically and triggered by the system after the RPH conversion.
- Automated: Once the detective work is finished and the RPH has successfully been converted, the Data analyst responsible for it will assign an Account Manager to such RPH and select the “Create Lead” option from the RPH lists. This action will trigger the Lead creation process and the system will automatically add a new Lead with the RPH information linked.
- Manual: this option is available for those cases in which a Lead needs to manually be created by a user, accessible thru the bar menu.

When referring to the "Manual" creation of the Lead, the system UI has two ways or access points to allow the creation:
- From the Lead menu, under the “New Lead” button
- And from the “Add Lead” button available from the “Lead List View” on the Lead module.
Either way the same form needs to be filled and is explained in detail in the following sections.
From this point the Account Manager will be in charge for the Lead and its successful conversion into an Opportunity.
What happens after the Lead Creation?
The lead is intended to be converted in an Account, meaning from a business perspective that a new customer was gained. For that to happen, in the standard process is necessary to create an opportunity and close it as won. In order to get that objective accomplished activities to attract client’s interest are performed and captured in the system, such as email campaigns, cold calls, among others.
Each lead will be managed by an unique Account Manager to avoid double work and communication with the client, that's the main reason that all the Leads are protected and blocked for an unique user, in a way that only the owner of the lead will be able to modify the information. All the other users will be able to see it but not to edit it.
Information contained in a Lead - New Lead Form
The lead information can be found in tabs that contain different types of information, and which is unique for each Lead.

These Tabs are:
Leads
This tab contains basic information of the Lead. When creating a new Lead, this information is needs to be filled in order to the system to capture the information.
Is separated in subsections to better sort the information.
Principal Lead Information

- Lead Owner: (Mandatory) the name of the account manager
- Lead Status (Mandatory)
- Management Company: represents the Lead´s Parent Account when applicable. It can either be selected from a list if the parent account already exists or created from scratch by clicking on the “+” button.
- Company/Site: (Mandatory) this name must be unique, and is the name which with the customer will be identified on the system. After the user types the three first characters the system will show you all similar names in case already exists in order to avoid duplications.
- Main Phone
- Property Type (Mandatory)
- Lead Source (Mandatory)
- Region (Mandatory)
- URL Company Site
- Email Domain
- Where Obtained
- Self Managed

- Major Player
Also in this section is possible to Upload and See images related to the Pothole or the Contact (in case exists on the database). It is usable by clicking on the hyperlinks
Contact Information
In this section users can find information about the contact related to the Lead. The user can define a contact that does not exist in the system by manually filling the required fields, or can search for an existing contact in the database.
The field “Email” is an unique key field, this means that if the email is already registered for any other contact on the database, the system will inform the user and will not allow the creation of a new contact.

Fields available on this section are:
- First Name
- Last Name
- Direct Phone
- Contact Mobile
- Name Help
- Fax Number
- Title
- Other Phone
- Email (unique key)
- Secondary email
- Linked in account
- Email Output (boolean field)

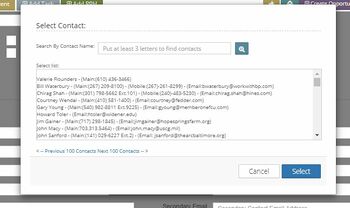
When the Contact already exists on the database, the user can manually select it from the Contact List by clicking on the button ![]() and then searching and selecting the contact from the list.
and then searching and selecting the contact from the list.
Address Information
This module has an address validation through Google Maps. The address information section has a “Validate Address” button to get the correct street and map coordinates (latitude and longitude values). States and Cities brackets are connected, and each one has a search field to easily identify values of states or cities.

Field of information on this section are:
- State Mandatory
- City Mandatory
- Street Mandatory
- Suite
- Apartment
- Bill Box Number or PO: defines the PO number in case an invoice or something else needs to be sent by mail.
- Electronic Email Bill: defines an email address to where the invoice should be sent.
- Special Billing Instructions: in case the job is completed, notes regarding special billing instructions can be added.
If a Management Company was selected for the Lead under work, and the address information exists on the database, the fields are automatically populated.
Pothole Damage Info
It is a free text field in which the users can add and review information regarding the reported pothole that triggered the Lead creation.
Lead Description
Free text field to add any kind of useful information about the Lead.
Map Location
Shows a satellite view of the site location, using the Google Maps API. From here the user can see location coordinates and choose between map and satellite view (GMaps features).
Reported PH´s
Shows the list of all the RPH´s linked to the Lead, and allows the user to quickly work with the records using the functions available on the column “Options”
A lead can have only 2 or more RPHs active at the same time.
Events & Activities
This tab shows the Notes, Call, Emails or Tasks related to the Lead. The main purpose is to keep the communication flowing with the potential customer by logging all the activities.
Opportunities
Through this tab the user can see and access all the opportunities related to the lead. A lead can have only 1 active opportunity at the same time.
External Proposals
External proposals that may be related to the lead will be visualized on this tab. It is also possible to create a new External Proposal and link it to the Lead by clicking on the button “Add External Proposal”.
The External Proposal can be opened from this list by clicking on the Proposal # as well.
The information will be visualized in the following columns:
- Proposal #
- Partner
- Created by
- Created (date)
- Status
- Options
History
Keeps a record of all the activities done on a Lead. Any modification or information added/attached is logged in the system and shown in historical order on this tab.
The user can see this in a list with the following columns:
- Modified Date: date and time of the log
- Type: event that triggered the log
- Owner: owner of the Lead
- Modified by: user that performed the activity that triggered the log
Actions available working on Lead
The CRM allows the user to perform a broad set of actions. While each module has its own set of specific actions, there are some of them that are "common" to all modules.
Action Tabs
These are the actions common to most of the modules
Action Tabs - Leads only
Edit Mode
Users can view or change lead information through the “View Lead Module”. When a lead is selected, the Lead Module Page will load all information and a set of options will be enabled into this page.
This page is the same page used to create leads. When a lead is loaded, button bar and tabs will be enabled to manage lead information.
This module has five buttons located on the left of the screen known as “Action Tabs”.
Create Opportunity
If the opportunity is closed as won, then system will:
- Converts the Lead into an Account
- Confirm and create the Management Company if it doesn't exist.
- Add the contact to the Contact List.
Assign to provider
This button allows the user to validate LeadWork’s job by giving them the “thumbs up” (or down) depending on the development of the RPH/ site
Delete Record
In order to eliminate a Lead the user must change to edit mode first, and then tick the checkbox for deleting a record.
Business Rules regarding Lead
- All leads can have only one active opportunity at the same time, but can have unlimited number of opportunities closed as lost.
- Leads will be only visible if they have an active opportunity or when closed as lost. If a related opportunity is closed as won, then the Lead will disappear and will be converted into an account.
- Protection icon: This icon changes if the lead is protected or unprotected. For Raw Leads, the max days that the system protects a Lead will be defined by RawLeadDays parameter (currently set on 45 days).
- Red Icon means Protected
- Green Icon means unprotected
- Every Opportunity must have an RPH previously created.