Difference between revisions of "Mobile applications"
| Line 1: | Line 1: | ||
=Lead generator= | =Lead generator= | ||
| + | External users, who are limited to using some parts of the CRM through special configuration, can use the Lead Generator application to generate or retrieve new customers' information. Fully linked to Google, the app is easy to log into and provides geolocation services. | ||
| − | + | "Hunters," through a license granted to them by the company, can search for new clients. They look for new potholes, register them in the system using the application, and receive payment for each successful client. | |
| − | + | Each time a hunter creates a Lead, they get an email notification to keep track of all records they have created. Pothole Repairs runs weekly reports to verify the number of leads and conversions made by our hunters, for which they are paid. | |
| − | |||
| − | |||
| − | |||
| − | |||
| − | |||
| − | |||
| − | |||
| − | |||
| − | |||
| + | Very similar to the RPH creation process of the CRM, the app has a "wizard" that guides the user step by step to avoid skipping any actions. Please find below a series of images showing each section with brief descriptions. | ||
[[File:Portada.png|500px|thumb|centre|App Portrait Picture]] | [[File:Portada.png|500px|thumb|centre|App Portrait Picture]] | ||
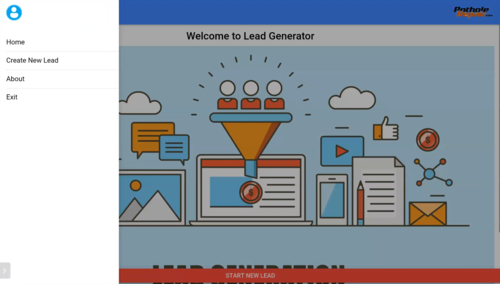
| − | + | The users can access more options by clicking on the sandwich menu at the top left corner. | |
| − | The users can access | ||
| − | |||
[[File:Menu.png|500px|thumb|centre|Menu]] | [[File:Menu.png|500px|thumb|centre|Menu]] | ||
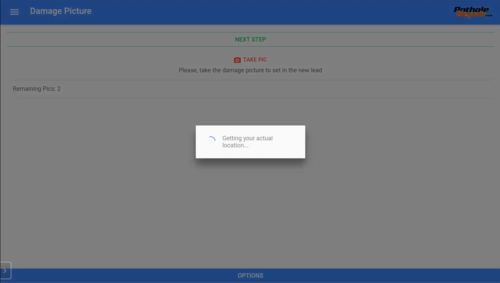
| − | + | Before creating a new lead, the app will connect to the GPS to automatically geolocate the potholes. | |
| − | |||
| − | |||
[[File:Start.png|500px|thumb|centre|Conecting to GPS]] | [[File:Start.png|500px|thumb|centre|Conecting to GPS]] | ||
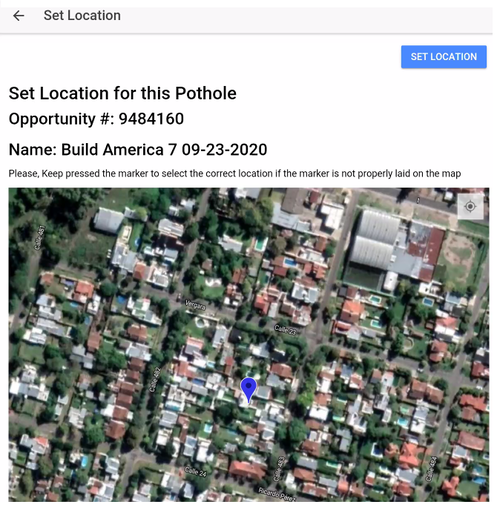
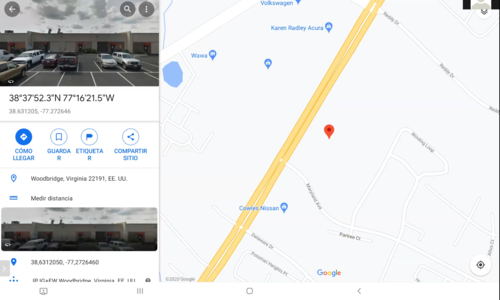
| − | + | If the app cannot retrieve the location automatically, then the user will manually set it by dragging the pin to the actual location. | |
| − | If the app | ||
| − | |||
[[File:Set location.png|500px|thumb|centre|Set PH damage location]] | [[File:Set location.png|500px|thumb|centre|Set PH damage location]] | ||
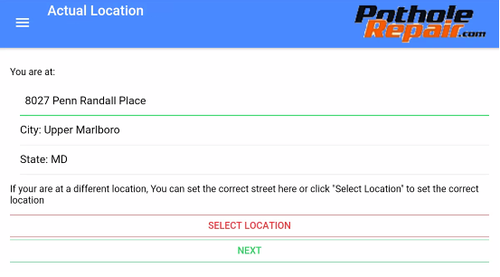
| − | + | Once the location is determined, the user can take two pictures | |
| − | Once the location | + | * the pothole image |
| − | + | * a picture of the entrance or commercial sign with the company's information to easily identify or match the pothole to the site. | |
[[File:4 LG.png|500px|thumb|center|Confirm Location]] | [[File:4 LG.png|500px|thumb|center|Confirm Location]] | ||
| − | + | After taking the pictures, the app will ask to provide a company name. | |
| − | After taking the pictures the app will ask to provide a company name | ||
| − | |||
[[File:5.png|500px|thumb|center|Provide company name]] | [[File:5.png|500px|thumb|center|Provide company name]] | ||
| − | + | And it will also ask to provide more information and a leasing name. | |
| − | And it will also ask to provide more information and a leasing name | ||
| − | |||
[[File:6Leasing.png|500px|thumb|center|Leasing pic]] | [[File:6Leasing.png|500px|thumb|center|Leasing pic]] | ||
| − | + | Finally, the user verifies all information and clicks on "create it." | |
| − | Finally the user | ||
| − | |||
[[File:7Create Lead.png|500px|thumb|center|Create Lead]] | [[File:7Create Lead.png|500px|thumb|center|Create Lead]] | ||
| − | + | The user has successfully created the new Lead. | |
| − | |||
[[File:8Lead Saved.png|500px|thumb|center|Lead Saved]] | [[File:8Lead Saved.png|500px|thumb|center|Lead Saved]] | ||
| Line 66: | Line 46: | ||
=Proposal Maker= | =Proposal Maker= | ||
| − | + | The Proposal Maker app works on the same concept as the Lead Generator App, using a "wizard" to guide the user step by step and avoid missing or skipping information. | |
| − | |||
| − | |||
| − | |||
| − | |||
| − | |||
| − | |||
| − | |||
| − | |||
| − | + | The slight difference between them is that surveyors use this app to assess the damage and provide quotes and job requirements to fix the potholes in a property, such as size, amount of TRs, type of work and tools needed, etc. Surveyors use their access to see all the activities assigned to them, including the property type to visit and directions to do so. | |
| + | The series of images below display each section with brief descriptions | ||
| + | Below is the main screen where the surveyors can see all assigned activities and filter them by date. | ||
[[File:PM-1.png|500px|thumb|center|Main Screen]] | [[File:PM-1.png|500px|thumb|center|Main Screen]] | ||
| − | + | For each task, they can directly contact the customer and the opportunity owner. | |
| − | For each task, they can directly | ||
| − | |||
[[File:PM-3.png|500px|thumb|center|Send an e-mail to the customer]] | [[File:PM-3.png|500px|thumb|center|Send an e-mail to the customer]] | ||
| − | |||
[[File:PM-2.png|500px|thumb|center|Call the customer]] | [[File:PM-2.png|500px|thumb|center|Call the customer]] | ||
| − | |||
[[File:PM-4.png|500px|thumb|center|Call opp owner]] | [[File:PM-4.png|500px|thumb|center|Call opp owner]] | ||
| − | + | They can see more information about the opportunity, use the GPS to navigate the property, or complete the opportunity. | |
| − | |||
| − | |||
[[File:PM-5.png|500px|thumb|center|See more info]] | [[File:PM-5.png|500px|thumb|center|See more info]] | ||
| Line 104: | Line 72: | ||
[[File:PM-7.png|500px|thumb|center|Complete Opp]] | [[File:PM-7.png|500px|thumb|center|Complete Opp]] | ||
| − | |||
[[File:PM-8.png|500px|thumb|center|Complete Opp]] | [[File:PM-8.png|500px|thumb|center|Complete Opp]] | ||
| − | + | If needed, the surveyors can also add more repairs, PH damage, or External Damage where the damage needs to be repaired by one of our partners. | |
| − | |||
| − | |||
[[File:PM-9.png|500px|thumb|center|Add more repairs]] | [[File:PM-9.png|500px|thumb|center|Add more repairs]] | ||
| − | + | If they were to add more repairs, they first need to take a "before picture" of the damage. | |
| − | If they were to add more repairs, first need to take a "before picture" | ||
| − | |||
[[File:PM-10.png|500px|thumb|center]] | [[File:PM-10.png|500px|thumb|center]] | ||
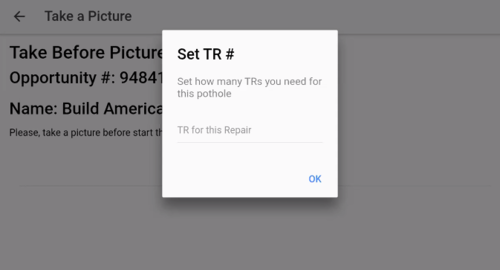
| − | + | After taking the picture, they have to set the estimated amount of TRs (Thermal Repairs) they think will be needed to fix that damage. | |
| − | After taking the picture they have to set the estimated amount of TRs (Thermal Repairs) they think | ||
| − | |||
[[File:PM-11.png|500px|thumb|center]] | [[File:PM-11.png|500px|thumb|center]] | ||
| − | + | In the next step, the surveyor has to set the specific pothole location, the more accurate, the better. | |
| − | In the next step the surveyor has to set the | ||
| − | |||
[[File:PM-12.png|500px|thumb|center]] | [[File:PM-12.png|500px|thumb|center]] | ||
| − | |||
[[File:PM-13.png|500px|thumb|center]] | [[File:PM-13.png|500px|thumb|center]] | ||
| − | + | Then they must specify whether the technicians will need to take any extra tools or materials, and finally add notes to the job. | |
| − | Then they must specify | ||
| − | |||
[[File:PM-14.png|500px|thumb|center]] | [[File:PM-14.png|500px|thumb|center]] | ||
| − | + | Finally, once they have closed it, the system will ask the technician to confirm having read the task notes, add notes to the opportunity, and finish the task. | |
| − | Finally, once they have closed it, the system will ask the technician to confirm having | ||
| − | |||
[[File:PM-15.png|500px|thumb|center]] | [[File:PM-15.png|500px|thumb|center]] | ||
| − | |||
[[File:PM-16.png|500px|thumb|center]] | [[File:PM-16.png|500px|thumb|center]] | ||
| − | |||
[[File:PM-17.png|500px|thumb|center]] | [[File:PM-17.png|500px|thumb|center]] | ||
| − | + | The other option is to add or create an External Proposal for our partners. When the surveyor clicks on "External Damage," the app will show a pop-up window asking confirmation to proceed. | |
| − | The other option is to add or create an External Proposal | ||
| − | |||
[[File:PM-18.png|500px|thumb|center]] | [[File:PM-18.png|500px|thumb|center]] | ||
| − | + | The surveyor must upload a picture of the damage before choosing the product or required type of work. | |
| − | |||
| − | |||
[[File:PM-19.png|500px|thumb|center]] | [[File:PM-19.png|500px|thumb|center]] | ||
| − | + | Finally, the wizard will ask the surveyor to add any notes. | |
| − | Finally the wizard will ask the surveyor to add any notes | ||
| − | |||
[[File:PM-20.png|500px|thumb|center]] | [[File:PM-20.png|500px|thumb|center]] | ||
| − | + | And a pop-up window will ask for confirmation to close the proposal. | |
| − | And a pop-up window will ask confirmation to close the proposal. | ||
| − | |||
[[File:PM-21.png|500px|thumb|center]] | [[File:PM-21.png|500px|thumb|center]] | ||
| Line 179: | Line 123: | ||
=E-Technician= | =E-Technician= | ||
| − | + | Our technicians use this app for two main purposes: | |
| − | + | * To check-in, to upload their time card, the truck inspection, and inventory. | |
| − | + | * To access all jobs, dispatches, and surveys assigned to them | |
| + | This application is solely for our employees' use and not for external users. | ||
[[File:Screenshot 20201215-104138 eTechnician.jpg|500px|thumb|center]] | [[File:Screenshot 20201215-104138 eTechnician.jpg|500px|thumb|center]] | ||
| − | + | From the main screen, our technicians can view both the Dispatches and Surveys assigned. | |
| − | |||
| − | |||
[[File:Screenshot 20201215-104158 eTechnician.jpg|500px|thumb|center]] | [[File:Screenshot 20201215-104158 eTechnician.jpg|500px|thumb|center]] | ||
| − | |||
They can access more options by hitting the sandwich menu at the top left corner. | They can access more options by hitting the sandwich menu at the top left corner. | ||
| − | |||
[[File:Screenshot 20201215-104203 eTechnician.jpg|500px|thumb|center]] | [[File:Screenshot 20201215-104203 eTechnician.jpg|500px|thumb|center]] | ||
| + | The "upload receipt" option allows them to upload any bill or expense they might have as part of their duties; this way, all expenses can be kept and tracked in one place. | ||
| − | + | When they hit "upload receipt," the app will open up the camera to take a picture of it. | |
| − | |||
| − | When they hit "upload receipt" the app will open up the camera to take a picture of it. | ||
| − | |||
[[File:Screenshot 20201215-104209 eTechnician.jpg|500px|thumb|center]] | [[File:Screenshot 20201215-104209 eTechnician.jpg|500px|thumb|center]] | ||
| − | + | When the technicians enter the application to see either a dispatch or survey, they can get a job preview showing all the work to do and the amount of TRs per damage. | |
| − | When the technicians enter to see either a dispatch or survey, they can get a preview | ||
| − | |||
[[File:Screenshot 20201215-104238 eTechnician.jpg|500px|thumb|center]] | [[File:Screenshot 20201215-104238 eTechnician.jpg|500px|thumb|center]] | ||
| − | |||
[[File:Screenshot 20201215-104231 eTechnician.jpg|500px|thumb|center]] | [[File:Screenshot 20201215-104231 eTechnician.jpg|500px|thumb|center]] | ||
| − | + | Before starting a job, the app will prevent the users from completing the daily inspections (check-in), explained in the [[dispatch]] section. | |
| − | Before starting a job, the app will prevent the users | ||
| − | |||
[[File:Screenshot 20201215-104242 eTechnician.jpg|500px|thumb|center]] | [[File:Screenshot 20201215-104242 eTechnician.jpg|500px|thumb|center]] | ||
| + | Once the daily inspections are completed, the system will allow them to continue. | ||
| − | + | When a technician hits "start," the system will send an email to the customer and to the owner of the opportunity to notify them the repair is in process. The system also allows Headquarters to track progress using a live feed regarding the job progression. | |
| − | |||
| − | When a technician | ||
| − | |||
| − | |||
| − | |||
[[File:Screenshot 20201215-104330 eTechnician.jpg|500px|thumb|center]] | [[File:Screenshot 20201215-104330 eTechnician.jpg|500px|thumb|center]] | ||
| − | |||
[[File:Screenshot 20201215-105915 eTechnician.jpg|500px|thumb|center]] | [[File:Screenshot 20201215-105915 eTechnician.jpg|500px|thumb|center]] | ||
| − | |||
After confirming the operation, the system will also remind the technicians to log out from their vehicles. | After confirming the operation, the system will also remind the technicians to log out from their vehicles. | ||
| − | |||
[[File:Screenshot 20201215-105924 eTechnician.jpg|500px|thumb|center]] | [[File:Screenshot 20201215-105924 eTechnician.jpg|500px|thumb|center]] | ||
| − | + | Technicians can see all details regarding the job, see the surveyor's notes, and call either the owner or the surveyor. Using buttons, they can | |
| − | |||
| − | |||
| − | |||
| − | |||
* Navigate to the pothole | * Navigate to the pothole | ||
| − | * Take a picture | + | * Take a picture after fixing the damage |
| − | * Reschedule the item | + | * Reschedule the item if they could not finish it at that time due to unexpected reasons. |
| − | |||
[[File:Screenshot 20201215-105929 eTechnician.jpg|500px|thumb|center]] | [[File:Screenshot 20201215-105929 eTechnician.jpg|500px|thumb|center]] | ||
| − | + | After taking the picture, the system will open a window and set the number of TRs needed to fix the pothole. | |
| − | After taking the picture the system will open a window | ||
| − | |||
[[File:Screenshot 20201215-105946 eTechnician.jpg|500px|thumb|center]] | [[File:Screenshot 20201215-105946 eTechnician.jpg|500px|thumb|center]] | ||
| − | + | They have to specify the type of repair they performed. | |
| − | |||
| − | |||
[[File:Screenshot 20201215-110002 eTechnician.jpg|500px|thumb|center]] | [[File:Screenshot 20201215-110002 eTechnician.jpg|500px|thumb|center]] | ||
| − | + | Please find an example of the view they get after completing the task. | |
| − | |||
| − | |||
[[File:Screenshot 20201215-110008 eTechnician.jpg|500px|thumb|center]] | [[File:Screenshot 20201215-110008 eTechnician.jpg|500px|thumb|center]] | ||
| − | + | At the end of the screen, there are more options to either add a new repair, reschedule the job or view the map. | |
| − | At the end of the screen there are more options to either add a new repair, reschedule the job or view the map. | ||
| − | |||
[[File:Screenshot 20201215-110011 eTechnician.jpg|500px|thumb|center]] | [[File:Screenshot 20201215-110011 eTechnician.jpg|500px|thumb|center]] | ||
| − | + | The process to add further repairs is very similar: Technicians need to click "add new," take a picture of the damage, set the estimated amount of TRs to be used, and set the location of the pothole. After they have added all the new additional repairs and clicked on "finish," the system will notify the account manager to get approvals. If approved, the technicians should fix those additionals repairs before leaving the property. | |
| − | The process to add | ||
| − | |||
| − | |||
| − | |||
| − | |||
| − | |||
[[File:Screenshot 20201215-110019 eTechnician.jpg|500px|thumb|center]] | [[File:Screenshot 20201215-110019 eTechnician.jpg|500px|thumb|center]] | ||
| Line 292: | Line 200: | ||
[[File:Screenshot 20201215-110051 eTechnician.jpg|500px|thumb|center]] | [[File:Screenshot 20201215-110051 eTechnician.jpg|500px|thumb|center]] | ||
| − | + | After they have completed all the items within the dispatch, they will automatically be redirected to this screen to add the last notes for the dispatch. | |
| − | After they have completed all the items within the dispatch, | ||
| − | |||
[[File:Screenshot 20201215-110255 eTechnician.jpg|500px|thumb|center]] | [[File:Screenshot 20201215-110255 eTechnician.jpg|500px|thumb|center]] | ||
| − | + | Once the job is complete, they can finally close the dispatch and confirm completion. | |
| − | |||
| − | |||
[[File:Screenshot 20201215-110257 eTechnician.jpg|500px|thumb|center]] | [[File:Screenshot 20201215-110257 eTechnician.jpg|500px|thumb|center]] | ||
| − | + | Now that the technicians are done, the app will prevent them from logging into their vehicle before driving to the next property. | |
| − | Now | ||
| − | |||
[[File:Screenshot 20201215-110300 eTechnician.jpg|500px|thumb|center]] | [[File:Screenshot 20201215-110300 eTechnician.jpg|500px|thumb|center]] | ||
Revision as of 18:54, 13 April 2021
Lead generator
External users, who are limited to using some parts of the CRM through special configuration, can use the Lead Generator application to generate or retrieve new customers' information. Fully linked to Google, the app is easy to log into and provides geolocation services.
"Hunters," through a license granted to them by the company, can search for new clients. They look for new potholes, register them in the system using the application, and receive payment for each successful client.
Each time a hunter creates a Lead, they get an email notification to keep track of all records they have created. Pothole Repairs runs weekly reports to verify the number of leads and conversions made by our hunters, for which they are paid.
Very similar to the RPH creation process of the CRM, the app has a "wizard" that guides the user step by step to avoid skipping any actions. Please find below a series of images showing each section with brief descriptions.
The users can access more options by clicking on the sandwich menu at the top left corner.
Before creating a new lead, the app will connect to the GPS to automatically geolocate the potholes.
If the app cannot retrieve the location automatically, then the user will manually set it by dragging the pin to the actual location.
Once the location is determined, the user can take two pictures
- the pothole image
- a picture of the entrance or commercial sign with the company's information to easily identify or match the pothole to the site.
After taking the pictures, the app will ask to provide a company name.
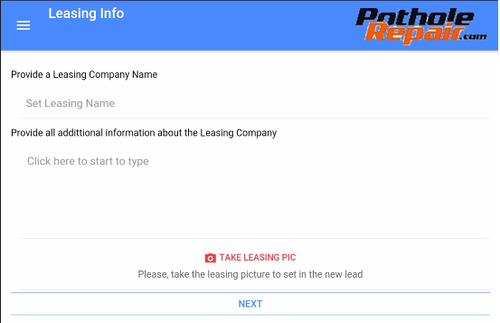
And it will also ask to provide more information and a leasing name.
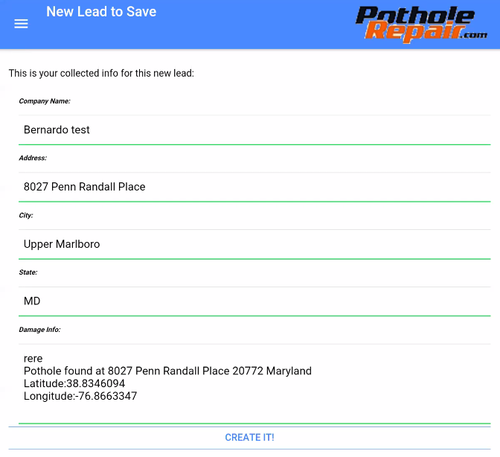
Finally, the user verifies all information and clicks on "create it."
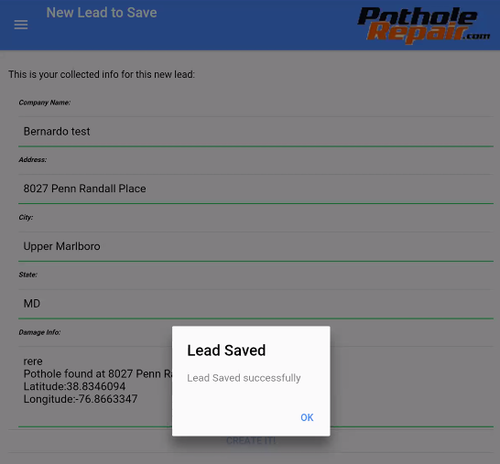
The user has successfully created the new Lead.
Proposal Maker
The Proposal Maker app works on the same concept as the Lead Generator App, using a "wizard" to guide the user step by step and avoid missing or skipping information.
The slight difference between them is that surveyors use this app to assess the damage and provide quotes and job requirements to fix the potholes in a property, such as size, amount of TRs, type of work and tools needed, etc. Surveyors use their access to see all the activities assigned to them, including the property type to visit and directions to do so.
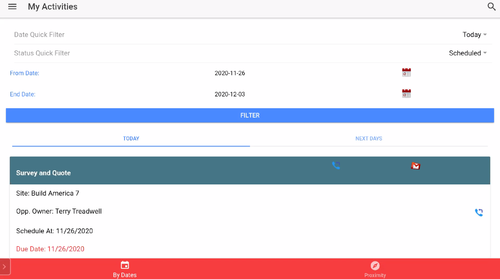
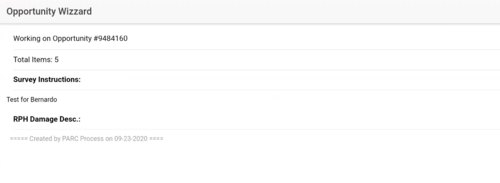
The series of images below display each section with brief descriptions Below is the main screen where the surveyors can see all assigned activities and filter them by date.
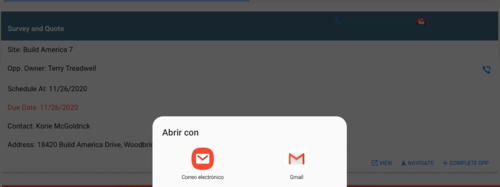
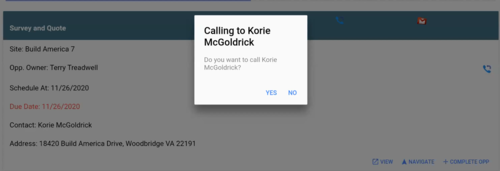
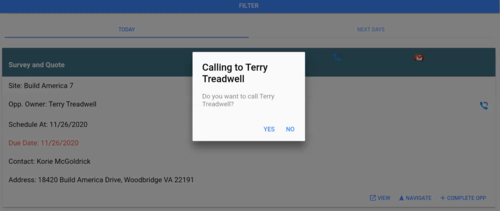
For each task, they can directly contact the customer and the opportunity owner.
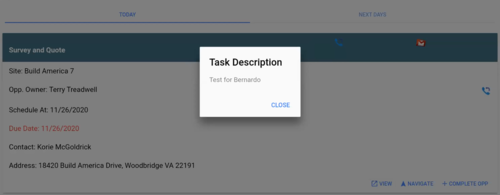
They can see more information about the opportunity, use the GPS to navigate the property, or complete the opportunity.
If needed, the surveyors can also add more repairs, PH damage, or External Damage where the damage needs to be repaired by one of our partners.
If they were to add more repairs, they first need to take a "before picture" of the damage.
After taking the picture, they have to set the estimated amount of TRs (Thermal Repairs) they think will be needed to fix that damage.
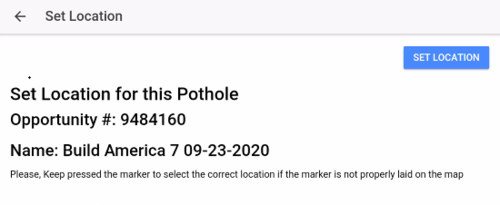
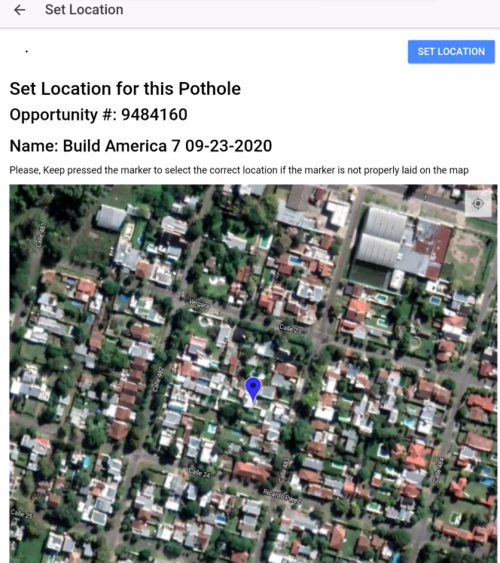
In the next step, the surveyor has to set the specific pothole location, the more accurate, the better.
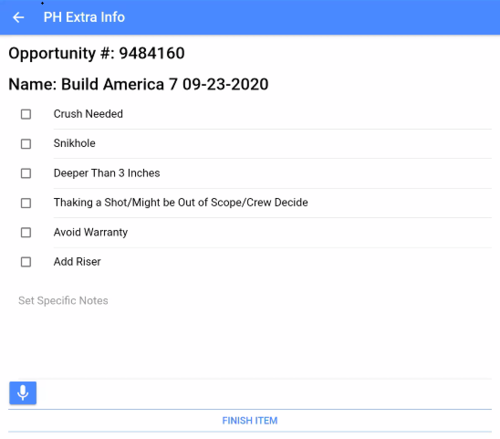
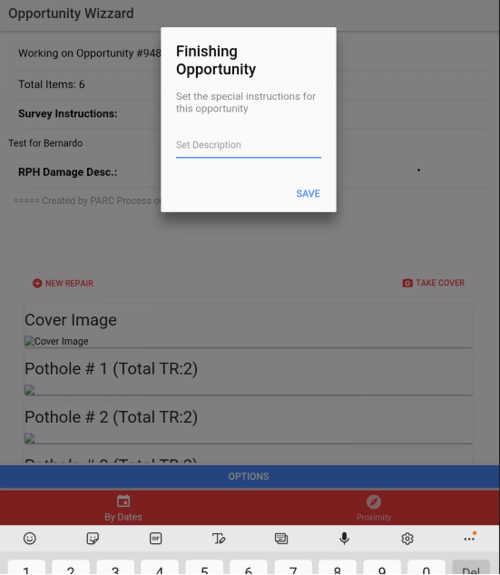
Then they must specify whether the technicians will need to take any extra tools or materials, and finally add notes to the job.
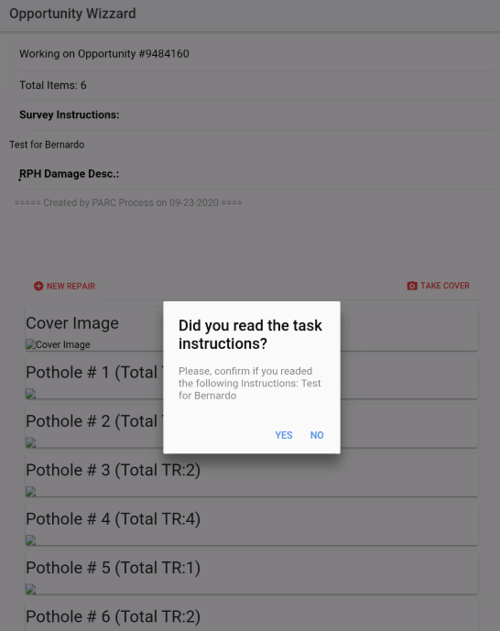
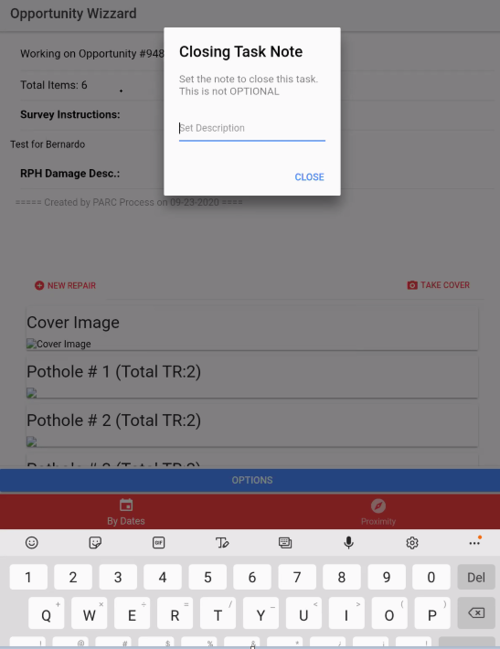
Finally, once they have closed it, the system will ask the technician to confirm having read the task notes, add notes to the opportunity, and finish the task.
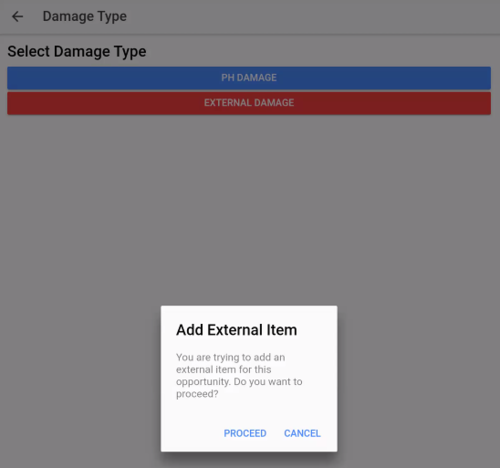
The other option is to add or create an External Proposal for our partners. When the surveyor clicks on "External Damage," the app will show a pop-up window asking confirmation to proceed.
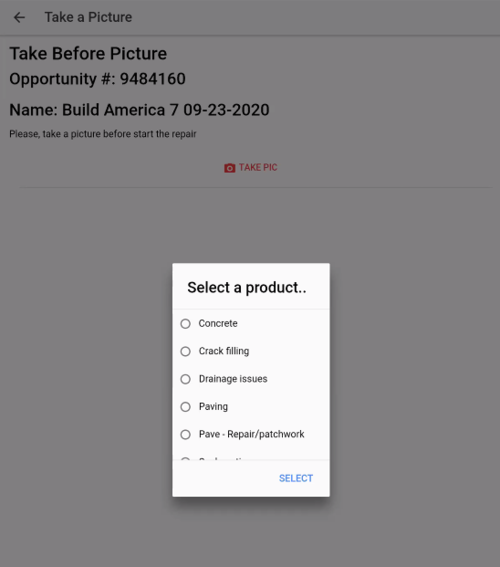
The surveyor must upload a picture of the damage before choosing the product or required type of work.
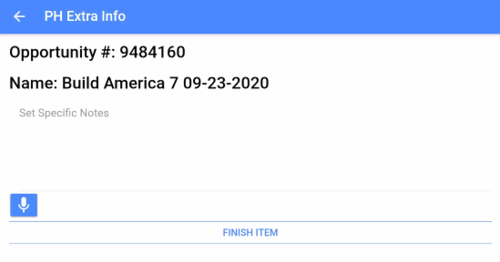
Finally, the wizard will ask the surveyor to add any notes.
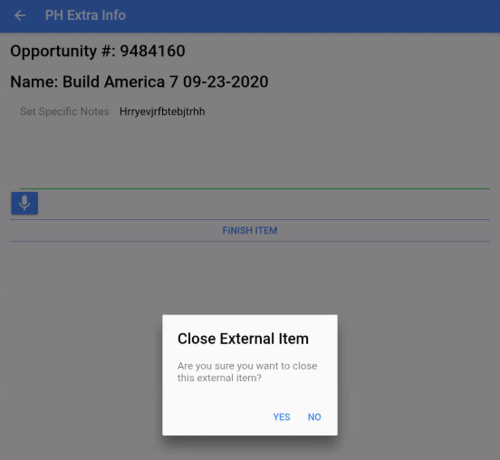
And a pop-up window will ask for confirmation to close the proposal.
E-Technician
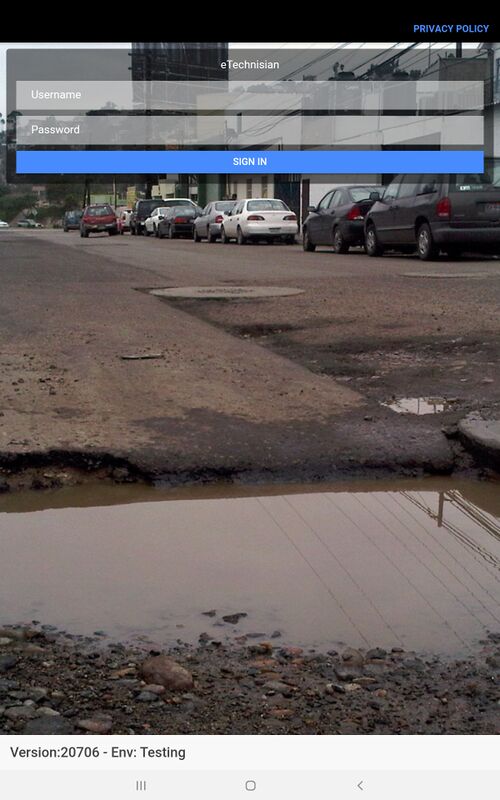
Our technicians use this app for two main purposes:
- To check-in, to upload their time card, the truck inspection, and inventory.
- To access all jobs, dispatches, and surveys assigned to them
This application is solely for our employees' use and not for external users.
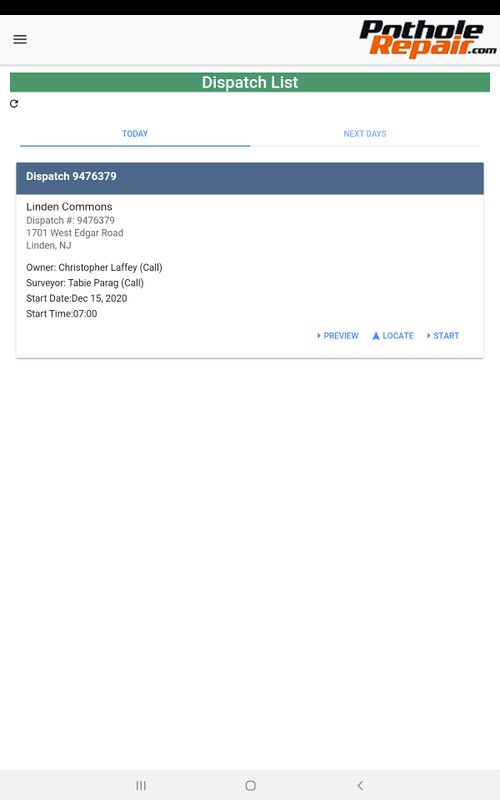
From the main screen, our technicians can view both the Dispatches and Surveys assigned.
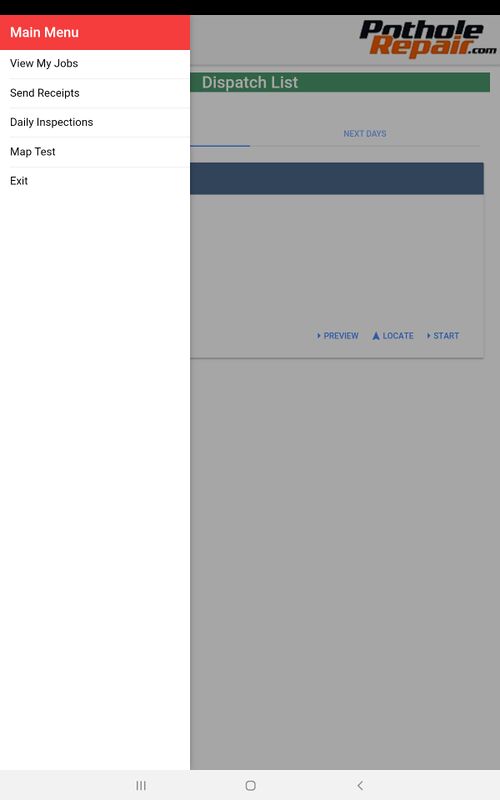
They can access more options by hitting the sandwich menu at the top left corner.
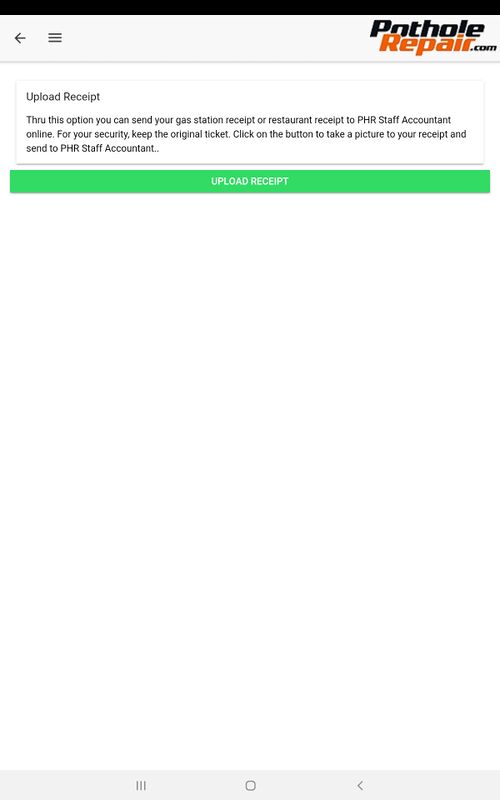
The "upload receipt" option allows them to upload any bill or expense they might have as part of their duties; this way, all expenses can be kept and tracked in one place.
When they hit "upload receipt," the app will open up the camera to take a picture of it.
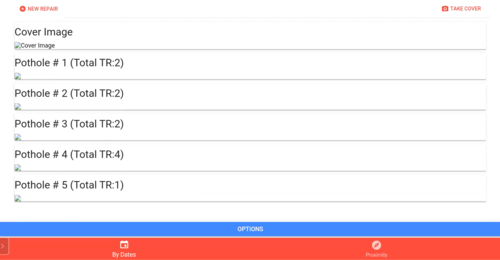
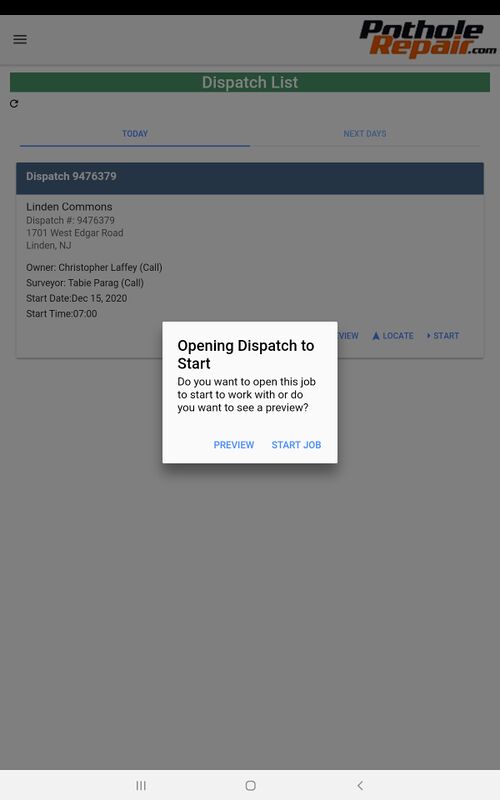
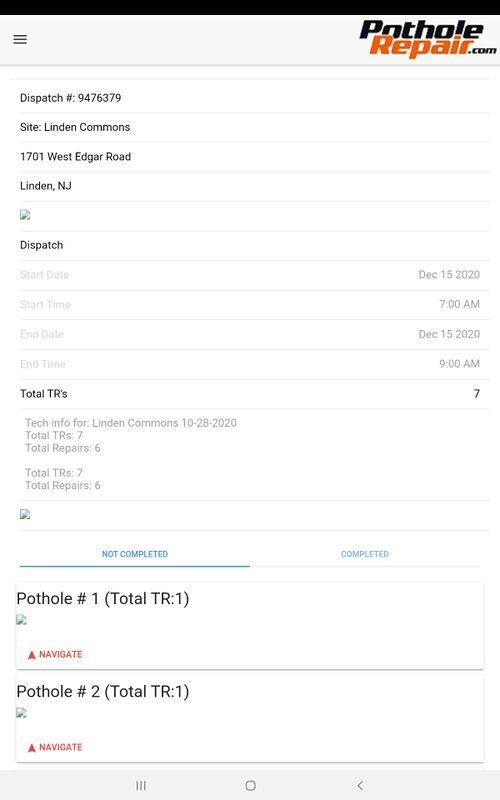
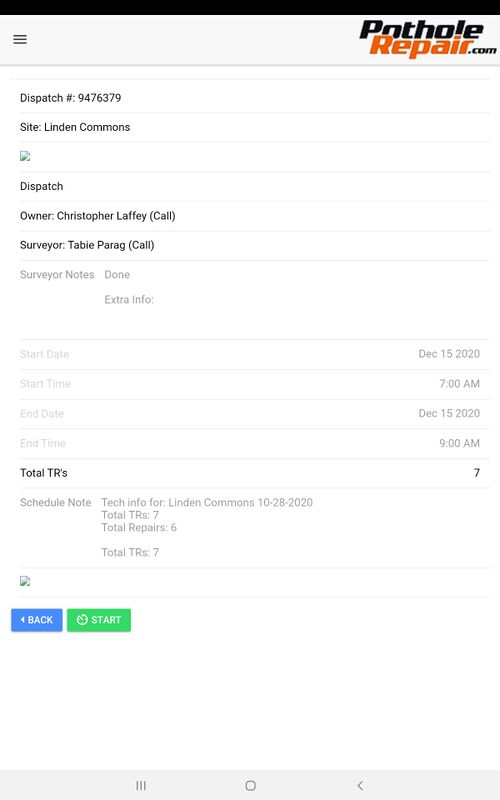
When the technicians enter the application to see either a dispatch or survey, they can get a job preview showing all the work to do and the amount of TRs per damage.
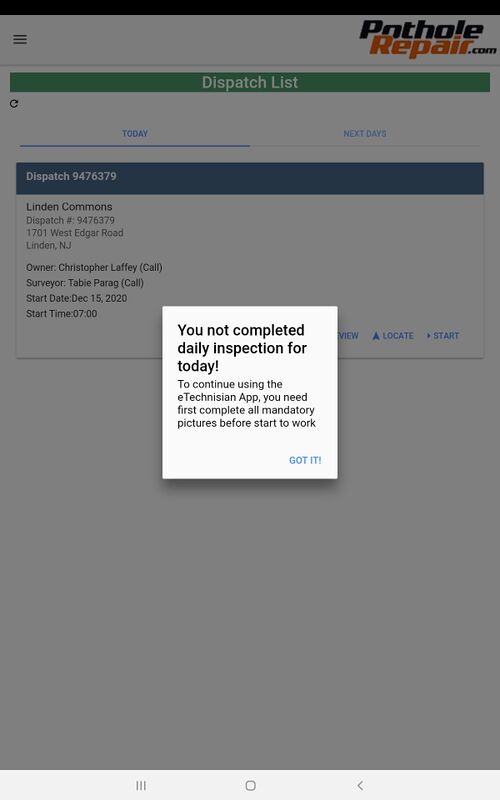
Before starting a job, the app will prevent the users from completing the daily inspections (check-in), explained in the dispatch section.
Once the daily inspections are completed, the system will allow them to continue.
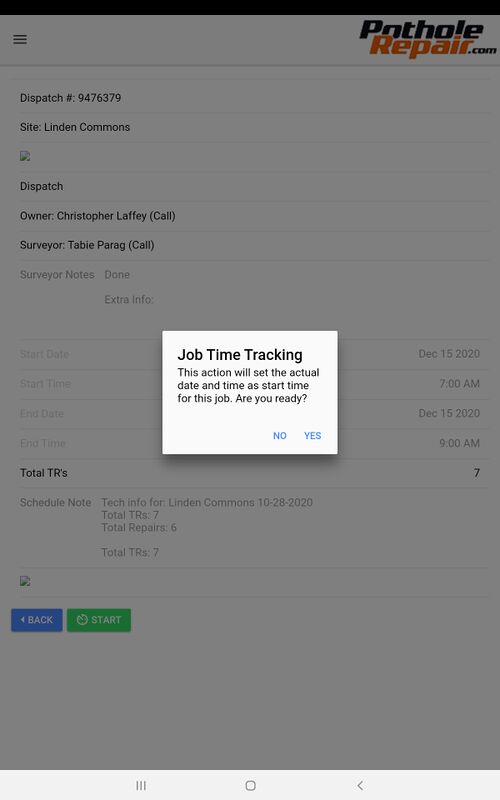
When a technician hits "start," the system will send an email to the customer and to the owner of the opportunity to notify them the repair is in process. The system also allows Headquarters to track progress using a live feed regarding the job progression.
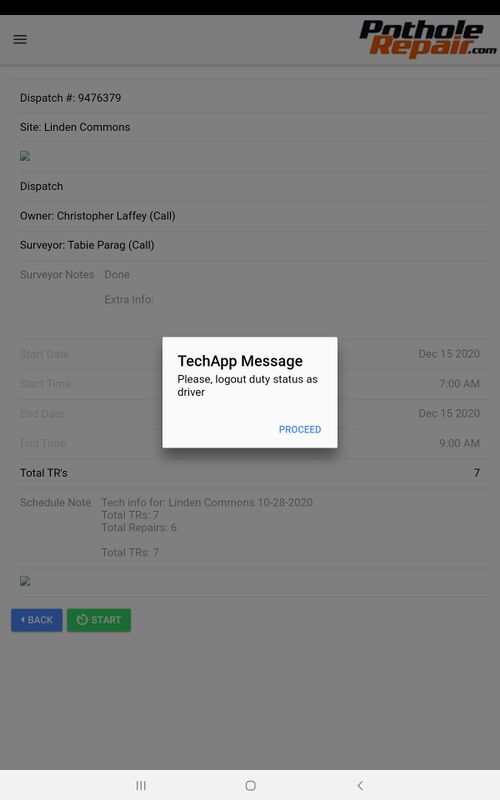
After confirming the operation, the system will also remind the technicians to log out from their vehicles.
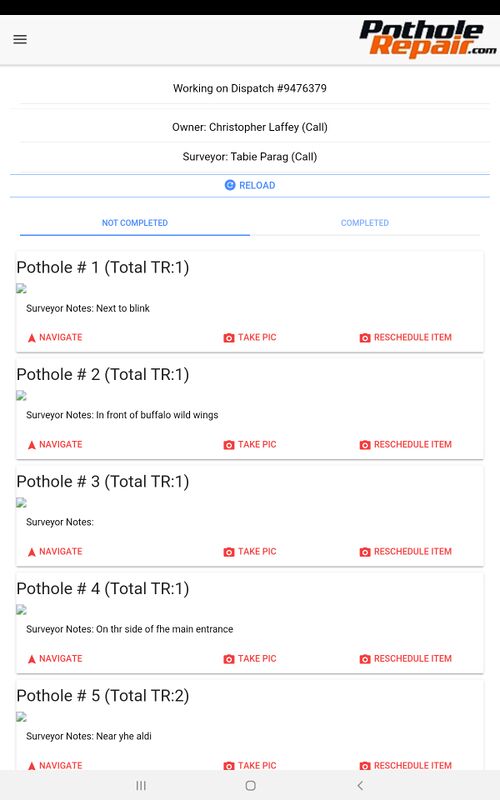
Technicians can see all details regarding the job, see the surveyor's notes, and call either the owner or the surveyor. Using buttons, they can
- Navigate to the pothole
- Take a picture after fixing the damage
- Reschedule the item if they could not finish it at that time due to unexpected reasons.
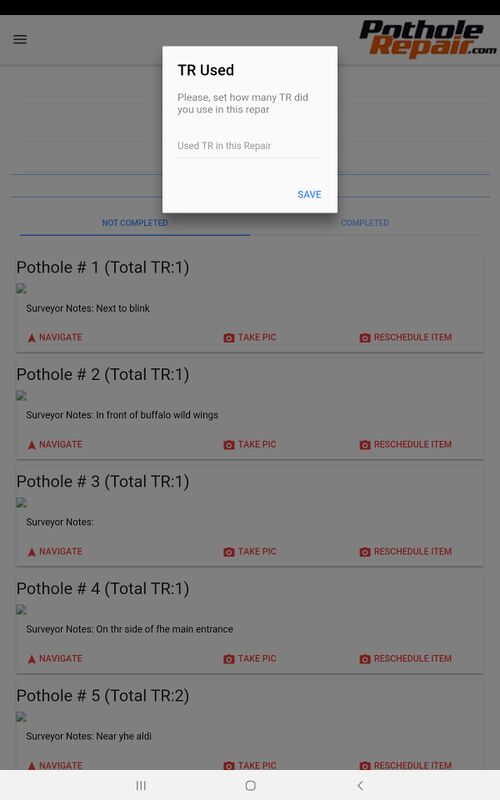
After taking the picture, the system will open a window and set the number of TRs needed to fix the pothole.
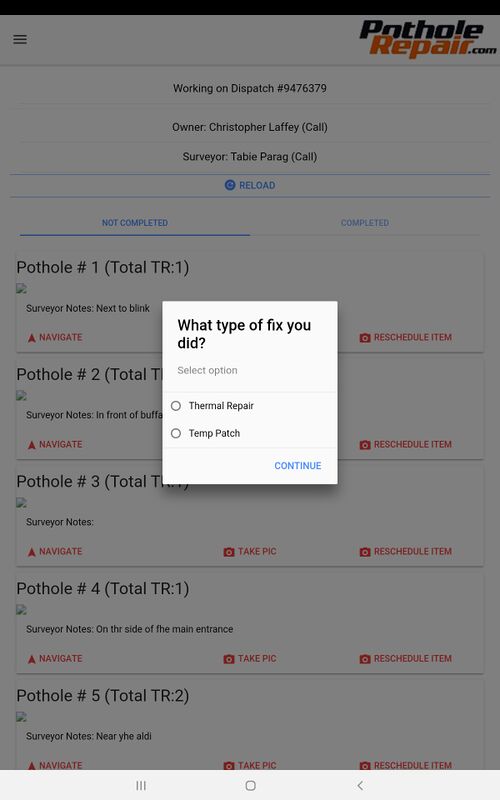
They have to specify the type of repair they performed.
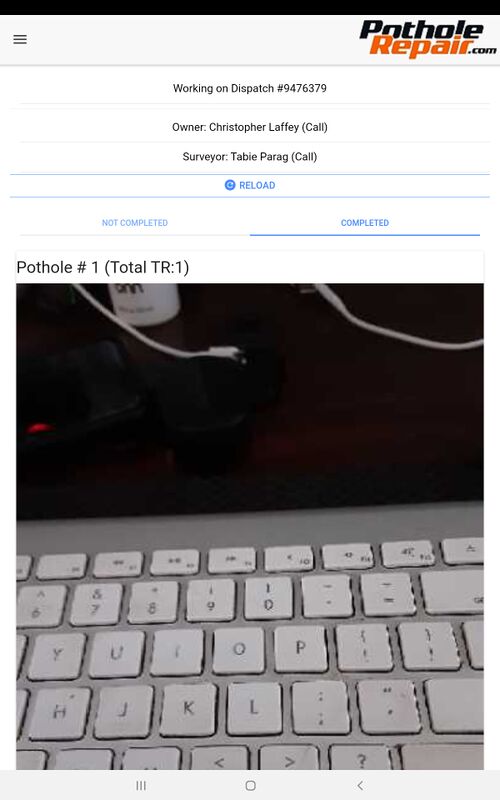
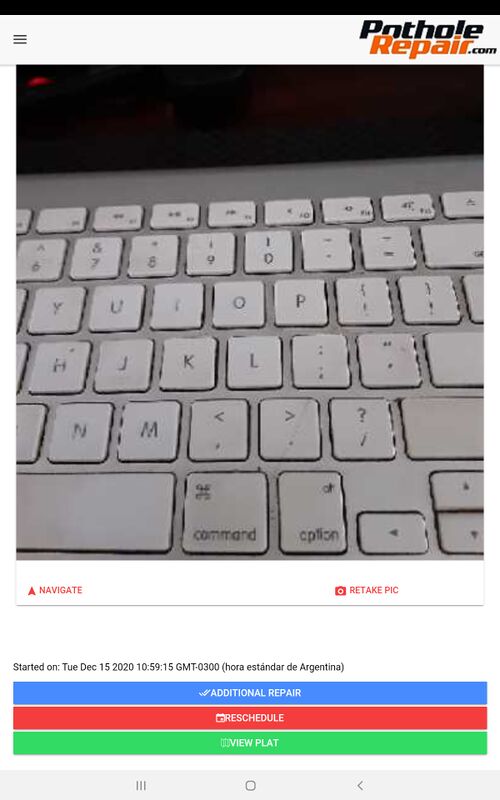
Please find an example of the view they get after completing the task.
At the end of the screen, there are more options to either add a new repair, reschedule the job or view the map.
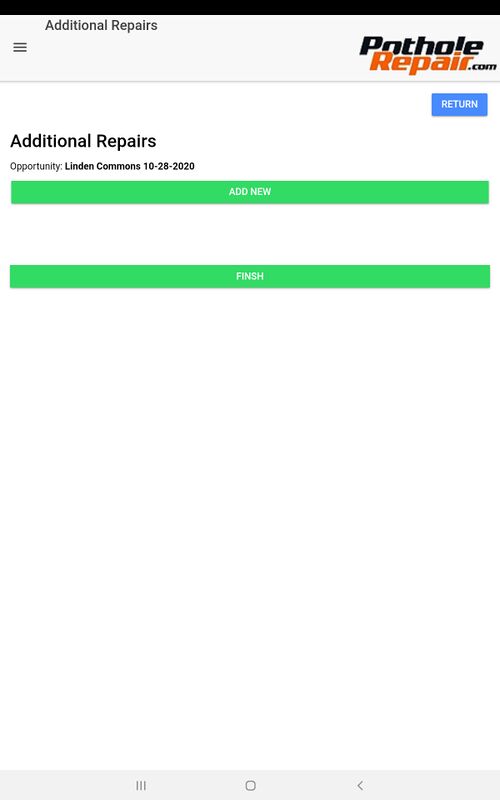
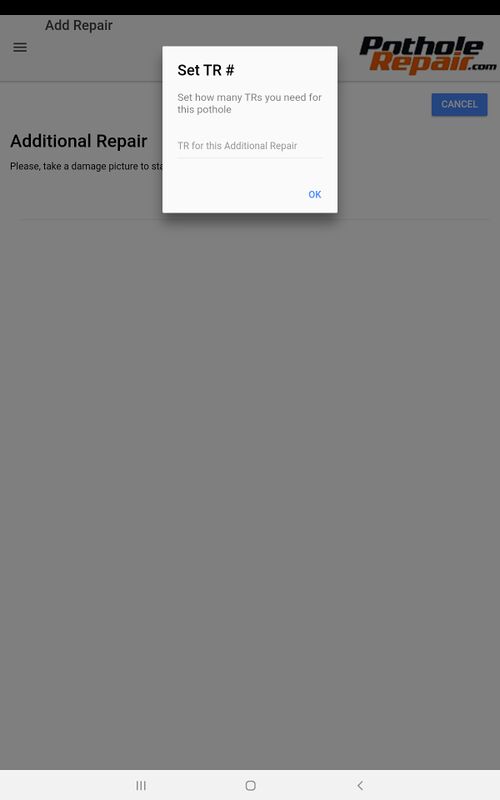
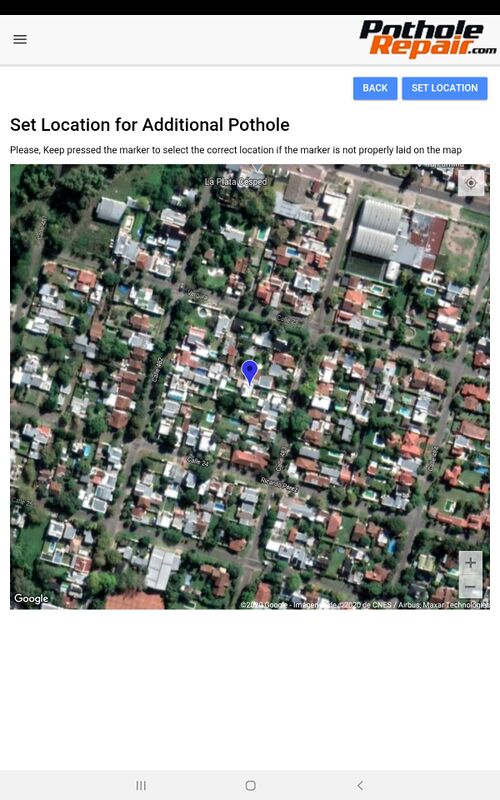
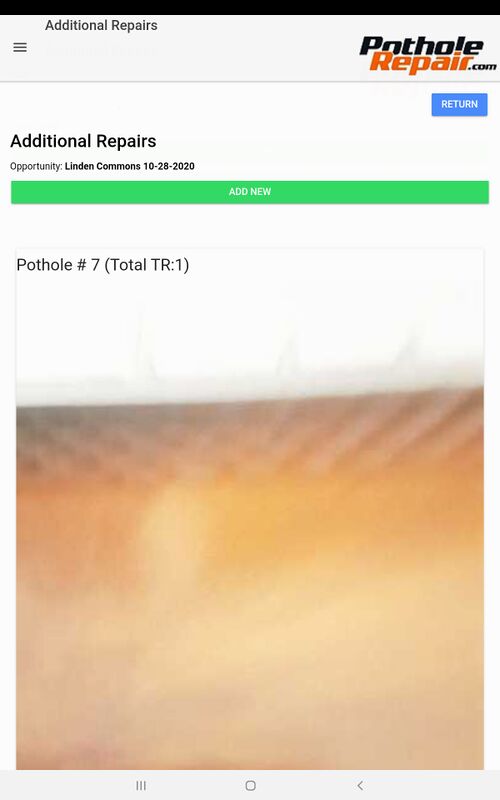
The process to add further repairs is very similar: Technicians need to click "add new," take a picture of the damage, set the estimated amount of TRs to be used, and set the location of the pothole. After they have added all the new additional repairs and clicked on "finish," the system will notify the account manager to get approvals. If approved, the technicians should fix those additionals repairs before leaving the property.
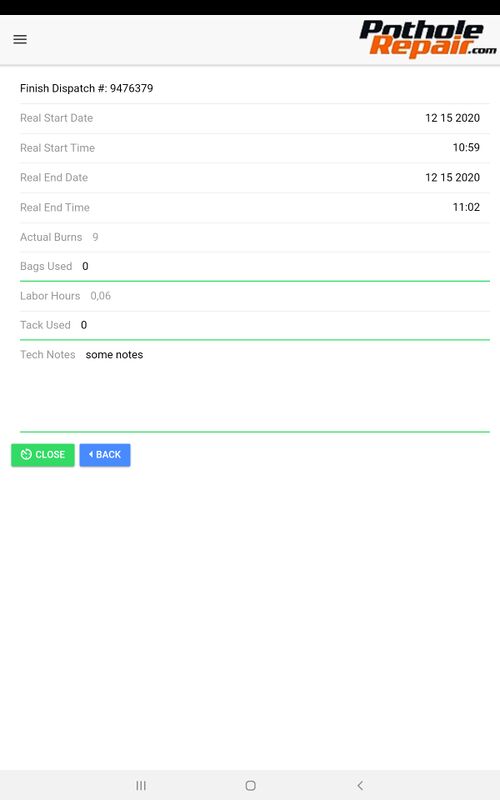
After they have completed all the items within the dispatch, they will automatically be redirected to this screen to add the last notes for the dispatch.
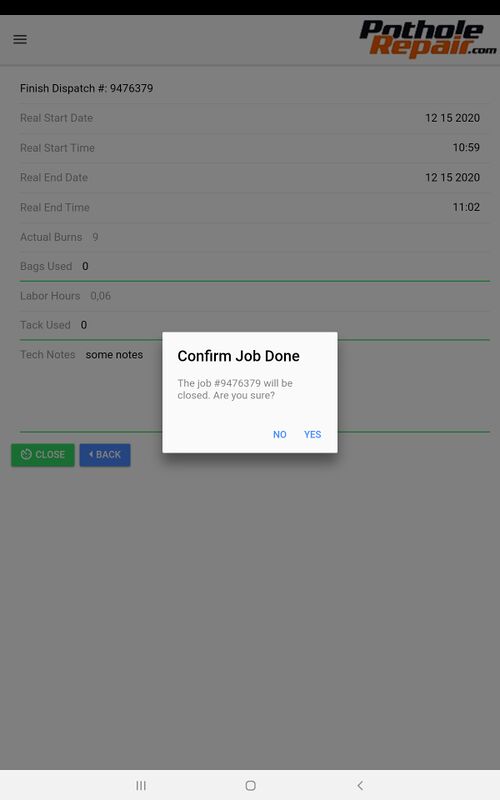
Once the job is complete, they can finally close the dispatch and confirm completion.
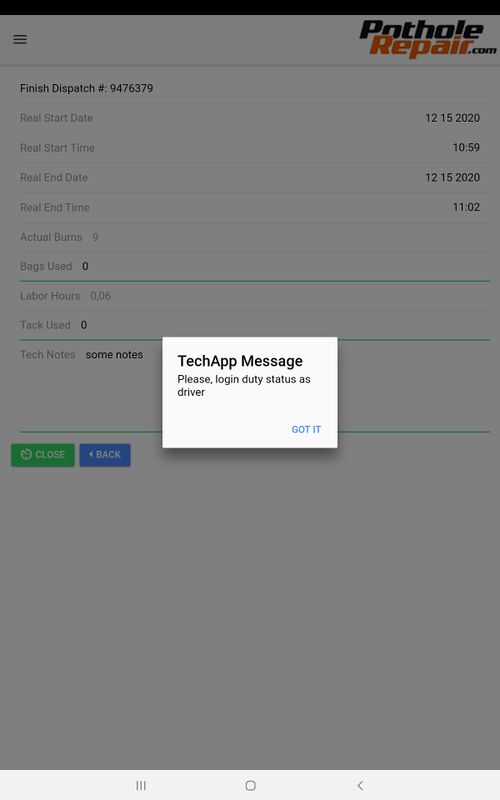
Now that the technicians are done, the app will prevent them from logging into their vehicle before driving to the next property.
