Dispatch
This module has multiple different functions and sections, but basically we use it to have a global view of all current and future jobs, while tracking its progress.
In order to make it easier to understand, we will explain first how to use the dispatch Dashboard. There are more sections in this module, which we will explain later.
Dispatch Dashboard
So this part of the module has the following sections:
- Tech Detail
- Dispatch Online Feed
- Dispatch to Check In
- Dispatches Completed By
- Late Jobs
- Dispatches
- Final Dispatches
- Survey Tasks
- Dispatch Schedule
We use this dashboard and each section on a daily basis, since it is a very intuitive way to keep most of the data we need to follow up on all the jobs.
Before we dive into each one of these sections, there is something to consider about how to use the dashboard.
At the top of the screen you will find a set of filters allowing the user to breakdown the information by time period, the technician doing the job, the owner of the opportunity that triggered the dispatch and the type of job (either dispatch or survey)
Note that these filters apply for the whole dashboard, so all the information you’ll see within the dashboard will have the filter applied, regardless of the section you may be working on.
Furthermore, like most of the modules of the CRM, there is the search bar at the very top of the screen. Keep in mind, this is not a universal search bar, it works to make a local search only.
Having said that, let’s see each section.
Tech Detail
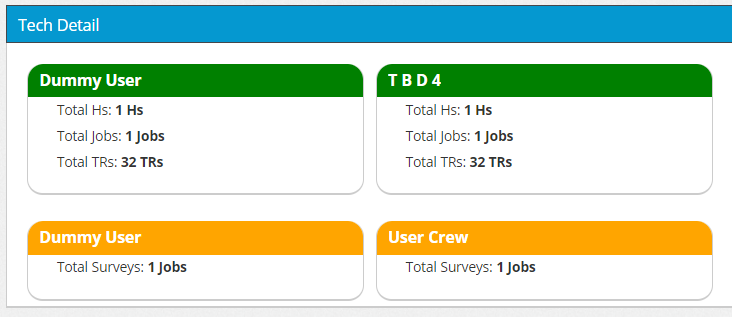
This part of the dashboard shows us how many jobs are scheduled and how many surveys are also scheduled.
The green boxes show how many TR (Thermal Repairs), hours and jobs have been scheduled for each technician on that week (remember you can change the period of time by applying a different filter). And the yellow boxes show how many surveys each surveyor is scheduled to do on that same week.
Dispatch Online Feed
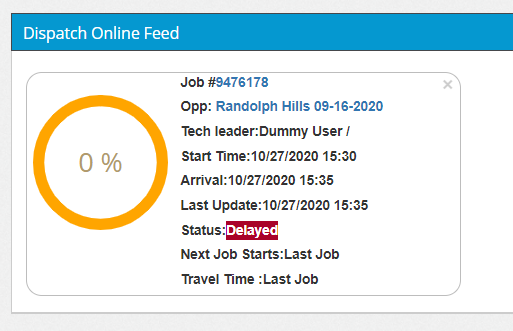
If there were any technicians doing jobs live, these would appear in this section, the Dispatch Online Feed.
For each job you have a sort of fuel tank gauge, showing the progress of the job. Here the user can see at a glance what job is being done, the opportunity linked to it, who is the technician leading the team, the time they arrived and what time they were supposed to start. So this way the system will put a status on it, either delayed or on time.
This way the account managers can keep track of the crews and reach out to them if they were running late for the jobs and see what is happening.
Dispatches to Check In
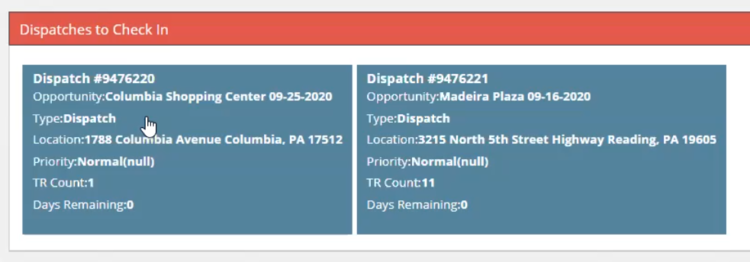
This shows up here once an account manager sells a job, and puts the appropriate paperwork in.
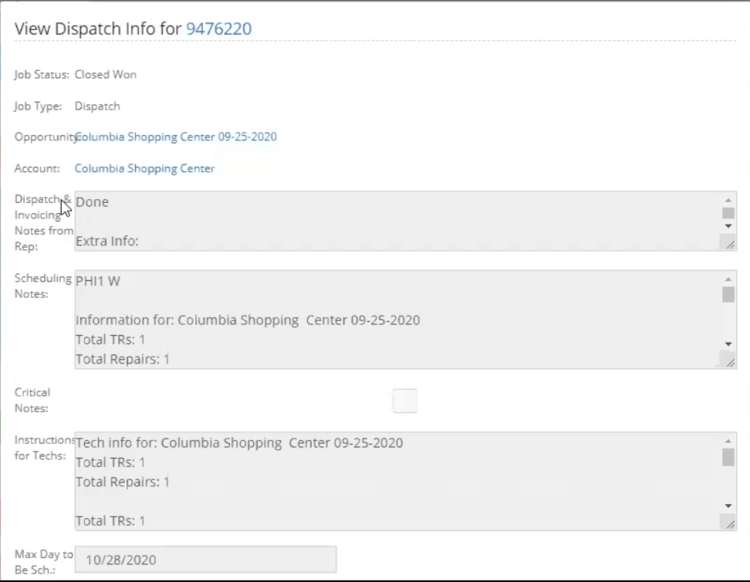
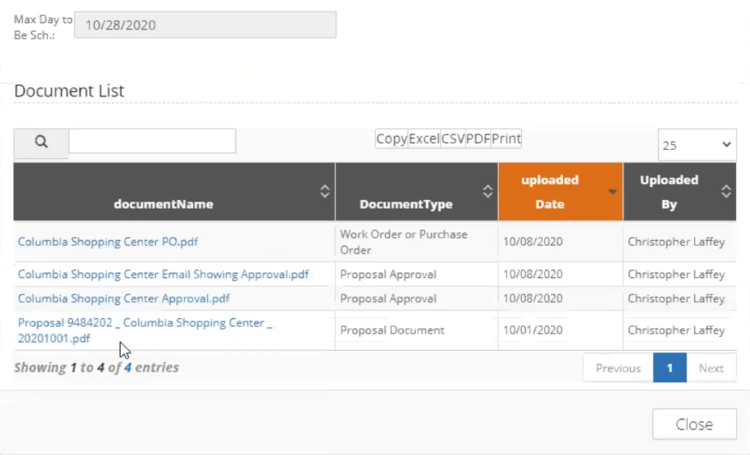
When a dispatch comes in, it needs to be verified. To do it, you just need to click on the dispatch to check in and print up the documents like the approval and the proposal.
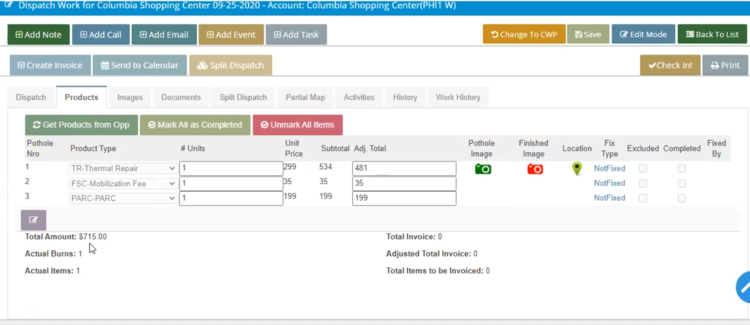
Then you will need to match up the price on the paperwork, with the price on the actual dispatch. You can easily do this by clicking on the dispatch number and looking at the final price under the “Products” tab.
After the verification has been done, the last thing to do is to mark the dispatch as “checked-in”. Once it is checked-in, and it will show up at the Dispatch section waiting to be scheduled.
Late Jobs
This section is to keep track of our surveyors.
Ideally you want to see this section with nothing in it.
So it is important to allow just enough time to each survey, that is why it is important to consider the property type and the visit type. For instance, usually a walk with a customer might take longer than a regular inspection and a smaall house. Another important thing to have in mind when allowing the time for a survey, is the traffic and the commute distance for the surveyor.
The idea of this section is to monitor the surveyors during the day and stay on top of them in case they need something from us or if they are running behind schedule.
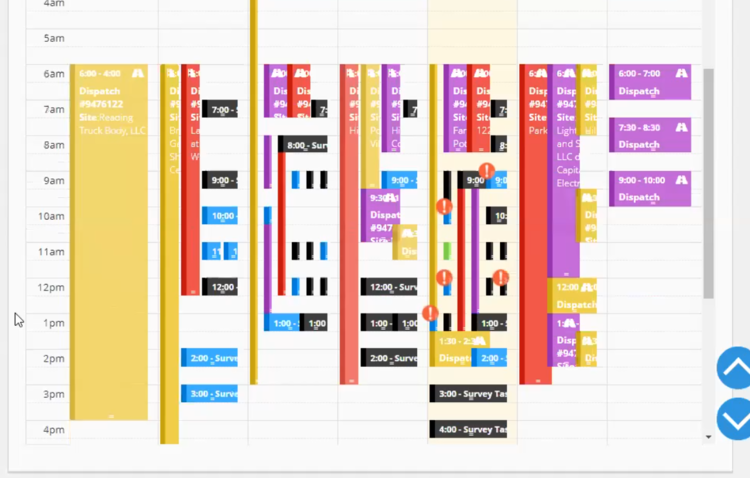
Late jobs also appear in the calendar with an exclamation sign next to them
Dispatches
As we explained in Dispatches to Check In, once they have been checked in, they will show up here in this section.
We have 3 different kind of dispatches that will come through:
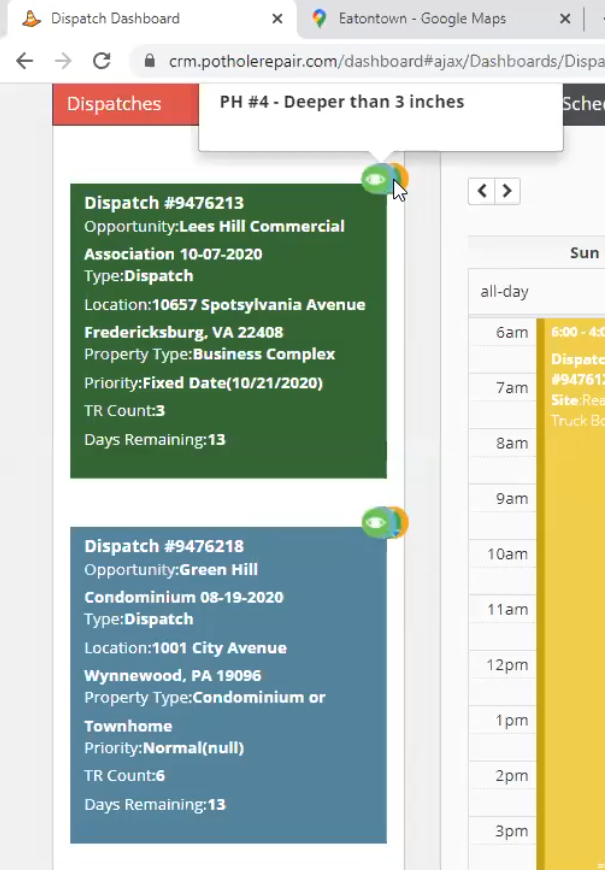
Normal dispatch: normal means we can go to the property within a 2 week timeframe, so we can schedule it to fit our own needs. Once the dispatch is on the calendar, the client is going to get an email when the team arrives and is going to get a picture when the job is done. This type of dispatch shows up in blue color.
Fixed date dispatch: in this kind of dispatch the customer will give us a deadline to finish the job, so we have to give the client a specific time and day in which we will visit their property to fix their potholes, this date has to be before the deadline of course. With these kinds of dispatches, we must keep good communication with our client all the time. This type of dispatch shows up in green color.
Urgent dispatch: this kind of job needs to be done within a 3 day timeframe. The customer pays a higher rate in order to get it fixed as soon as possible. This kind of dispatch aims to help eliminate trip and fall situations, for instance when there is a grocery store with a pothole in front of their door. This type of dispatch shows up in yellow color.
How to schedule a dispatch
You can schedule a dispatch by either the “drag and drop” method or by clicking the golden star on the top right corner of the dispatch.
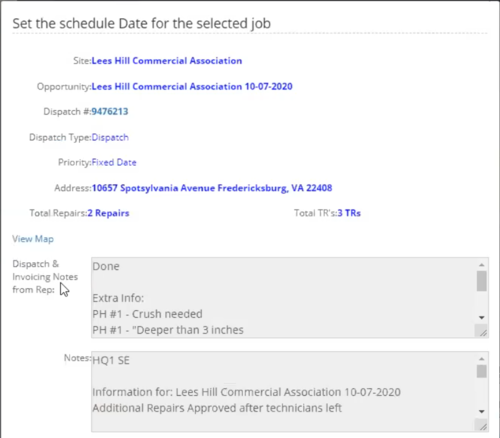
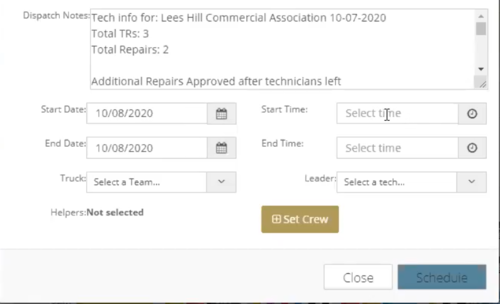
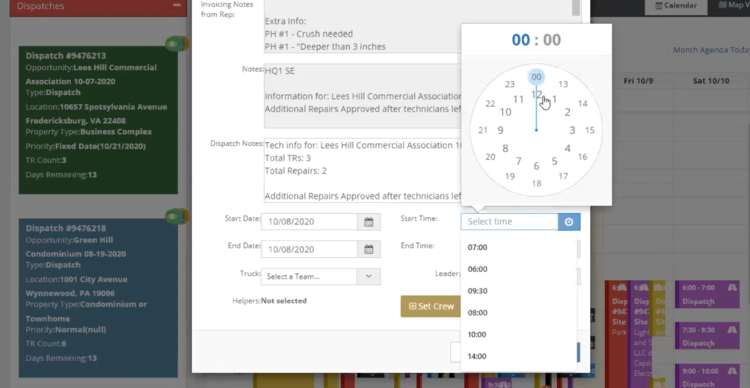
With the first one you just need to click on the dispatch and slide it to the calendar. This way a pop-up window will open up for you to select the start and end time for the job. Keep in mind the amount of TRs for the job to allow enough time.
The window also has different notes made by the surveyors, these could be about the potholes, the distance to the property from the headquarters, or any particular notes added by the account manager in order to satisfy our customer needs.
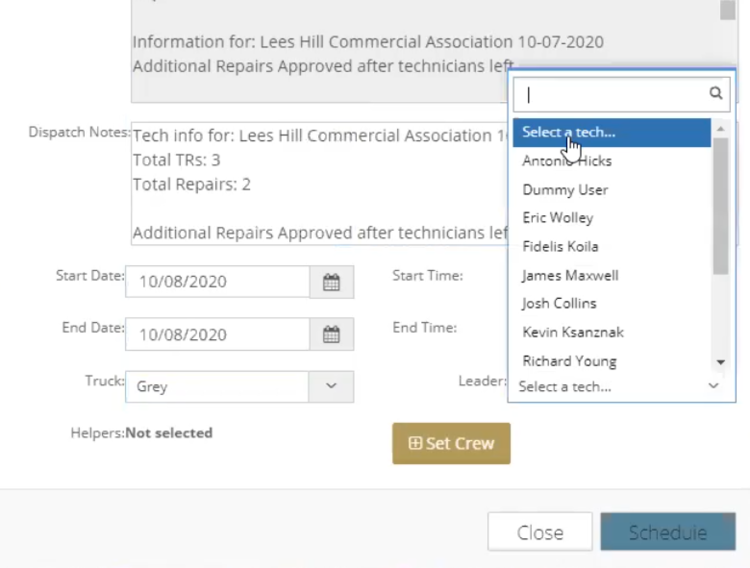
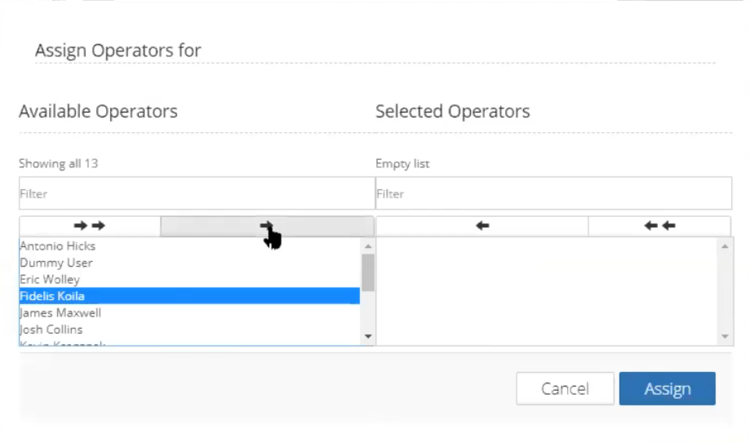
After that, we need to assign the dispatch to a team. To do this, just click on the dropdown arrow next to the button of the truck. Now, here you could either choose a team that already has been assigned to another job, or you could set a new team. To set up a new one, first choose the team color, let’s say gray like in the example of the picture, and then choose a team leader. Once you have selected the team leader, a new window will open up, this time you need to select the crew that is going to join the leader in the truck and click on the right arrow at the top to bring them over to the new crew.
The other option to schedule a dispatch is by clicking on the golden star at the top right corner of the dispatches.
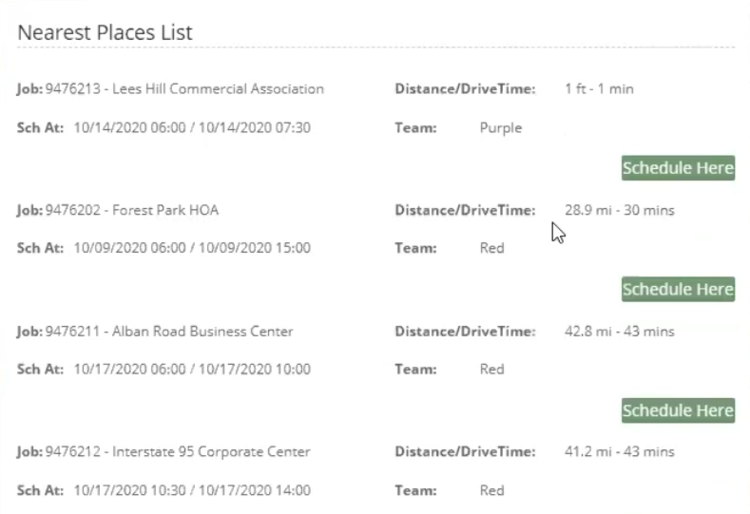
This is a very interesting option, when you push that golden star the system is going to open a window showing you a list with the nearest places, so that way you can schedule the dispatch within that time frame. It also gives you the distance and travel time from the headquarters by using the google map API.
The only thing to consider when using this feature is to double check first whether you can fit that dispatch there, so a good thing to do is to look at the calendar to make sure there is enough time to schedule it.
How do you know you are not assigning the same person to two different teams?
Lucky for us the system also validates this doesn’t happen. When you first assign a color to a team the system will block the people on that team from being selected again. At the same time, this is pretty easy to avoid by just quickly looking at the calendar. Every schedule job is on that calendar, so you can visually see if either a team or time is already engaged.
Map-view feature
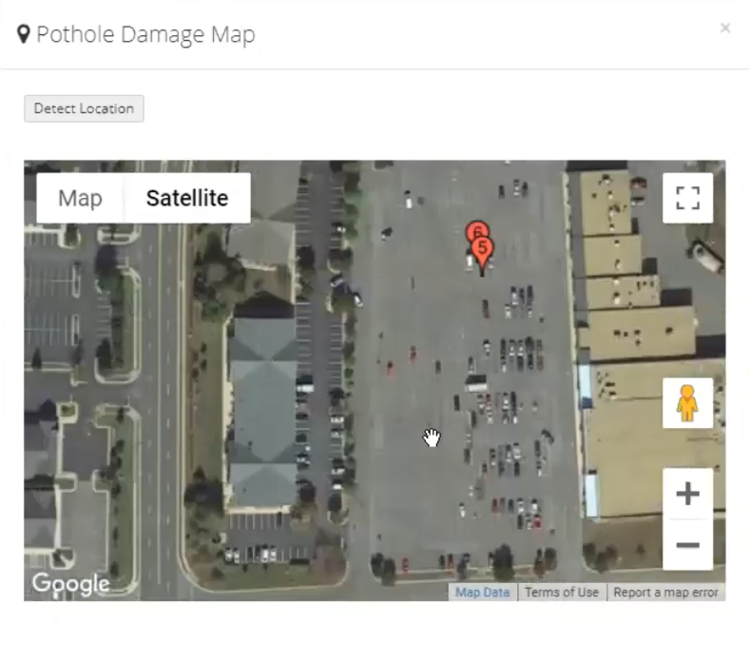
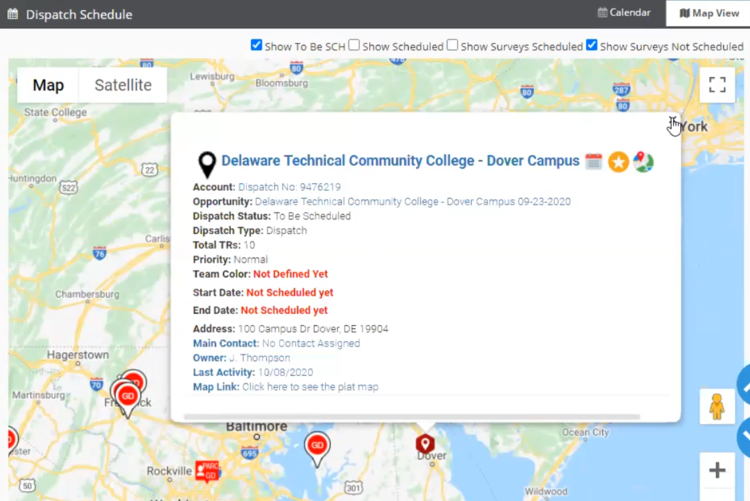
We also have the map feature which allows you to actually locate potholes in the property. Again, here you can drag the pin to where the pothole is exactly located. This feature is very useful since you can make sure there are no repairs in parking spaces, otherwise you might want to add a note and let the team know. And of course you can zoom in or zoom out the map view, pull up a full screen or use the street view option.
Furthermore, next this map-view button you can find some more little features. These will let you access the pictures of the damage, the job specifications, etcetera. To see all of them you only need to move the cursor over these buttons and read the hint for each one.
Final Dispatches
This section is to keep track of temporary repairs performed under the cold weather programme.
So a temporary repair will show up first as a normal dispatch, it will be scheduled like any other job and when the technician finishes the work the system will move it to the final dispatch section. This creates a reminder to do a final dispatch, which will also appear in the calendar view, of course.
Once the final thermal repair is done, the dispatch will be closed.
Survey Tasks
These are the surveys that need to be scheduled so our surveyors can visit the properties to do their job.
Because we get quite frequently a large amount of tasks, we don’t use the list view to schedule them, though you could do it since it works exactly the same as the drag and drop method explained before, just like we did on dispatches.
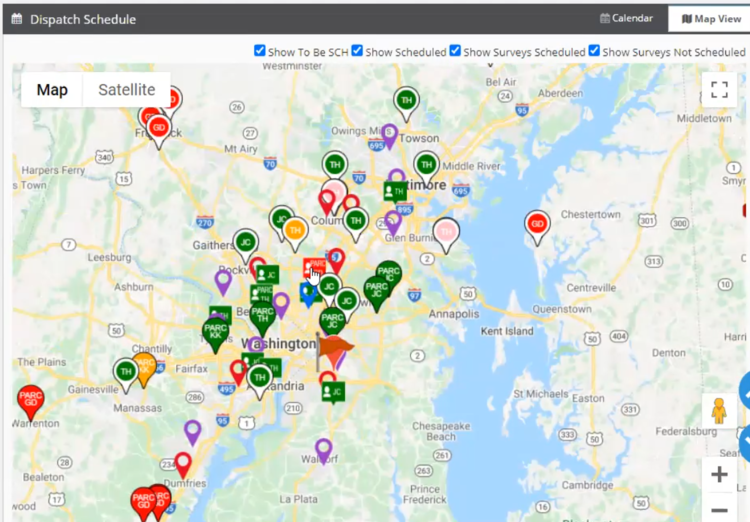
Anyhow, we prefer to use the map view since it condenses all the tasks in just one place. This way you can see the big picture, which allows you to create more efficients runs for our surveyors, when they are out visiting our customers. For instance you could schedule the tasks in a way that the surveyor drives in a sort of circuit that aims to visit the most amount of properties driving the least possible kilometers.
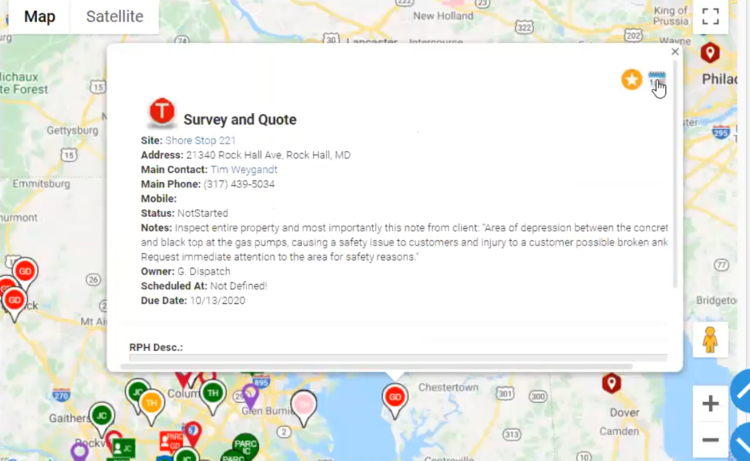
As you may notice, there are different shapes and colors for the pins on the map. The purpose is to make it even more intuitive for the user, so that way you wouldn’t need to click on the task to see what it is, but just look at it.
Key reference:
- Red GD*/PARC- indicates this survey still needs to be scheduled.
- Black GD/PARC- indicates this survey is scheduled.
- Pink GD/PARC- indicates this survey is scheduled but it is late.
- Violet GD/PARC- indicates this survey is not scheduled and is about to be late.
- Blue GD/PARC- indicates this survey is high priority.
- Green GD/PARC- indicates this survey is completed.
(*)General Dispatch
The process to schedule a survey is very similar to scheduling a task. The only difference is, since we are working on the map, first you need to click on the survey icon to be scheduled. This will pop up a window with the survey information, and to schedule it you need to hit on the calendar icon at the top right corner.
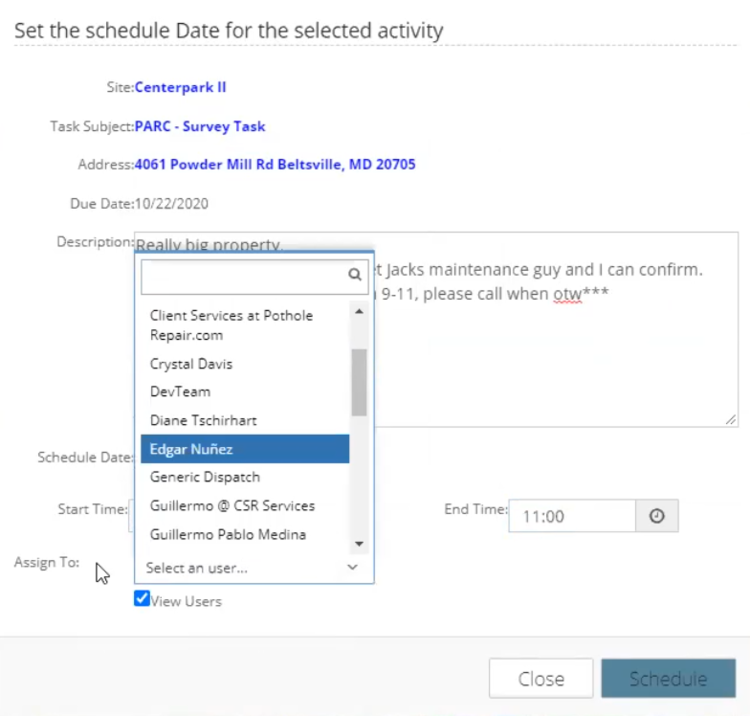
Once you have done that, just follow the same steps as before when scheduling a task.
Another feature to keep in mind is the “view users” option. When you are assigning the survey, by default the system will show technicians only unless you click on “view all users”. This option will show every user within the system.
Last but not least, another very useful feature is the filters. At the top of the map you will find a set of check-boxes with filters, these will allow you to quickly filter the jobs and surveys you see on the map.
This comes out very handy when starting the day for instance, and you just want to see only those surveys which need to be scheduled.
View all dispatches
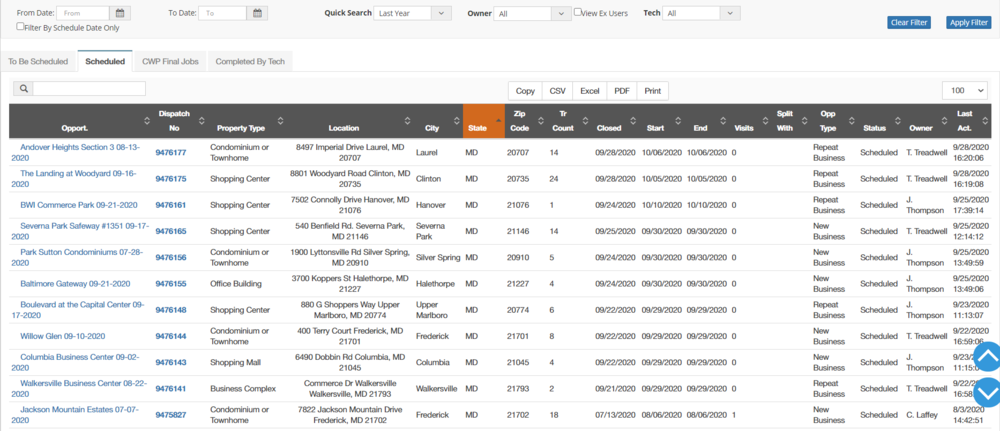
In this screen you can see the same information shown in the Dispatch Dashboard (and you will find it very similar to previous modules in the way to surf through the information).
The difference here, as you can see, is that all is in standard tables and list views. There are 4 primary tabs:
- To be scheduled
- Scheduled
- CWP Final Jobs
- Completed by tech
You can do most of the things in here that you can do in the dashboard, but here you won’t have the map view, the calendar and many other features, which hinders the usability to work.
Also know that this does not include anything about surveys. The surveys tab is located under the menu “Dispatch Tasks”.
These two menus (View all dispatches and Dispatch tasks) still have a lot of value, but they are used under very specific situations by the management when analyzing overall data.
Techs days off
This section of the module allows the user to schedule the days off for our technicians.
It is very easy and intuitive to do.
Just need to select the Technician, then select the date the person will be off and finally add a note explaining the reason that person is taking the day.
Once done, the system is going to populate it over the calendar, so when someone is scheduling a job it will prevent them from assigning that technician.
Daily Inspection Report
This is where we keep the log of our technician’s check-in.
Before they do their job, they have to upload 3 files over the mobile app. These files are:
- The Timecard
- The Inventory
- The Inspection Card.
This is the way they check-in and let us know they are ready to start.
So they have to upload a picture of themselves, which is going to show up the date and time and this will work for the check-in. This is The Timecard.
The inspection card is a safety inspection, Do the tyres have air? Are the lights working? Etc.
And the inventory is a material inspection, Do they have enough asphalt? Do they have shovels? Etc.

